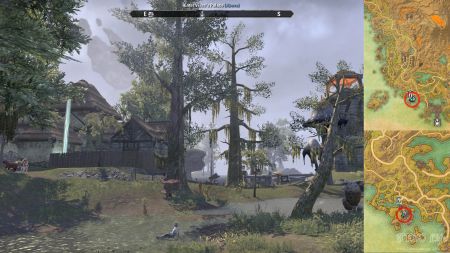
At a small shrine where the road forks
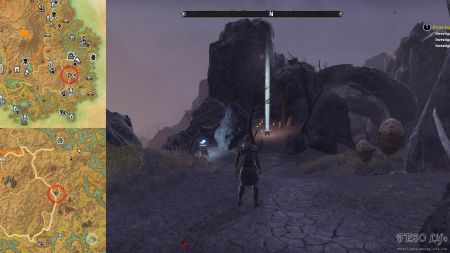
This is one of those shards that you can’t miss. That is, if you are following the main road. The name heavily hints towards the location. One may wonder if the name came before the location was even set, or was it the other way around.
Just head north from the Molar Mag Wayshrine. There is a small ascending part, that takes you to the top of the hill. As you pass by the short blue fire brazier, the path will go downhill, right toward the shard. Its glow is a bit hidden by the large rocks next to it, so spotting it might be a problem if you come from the other direction.
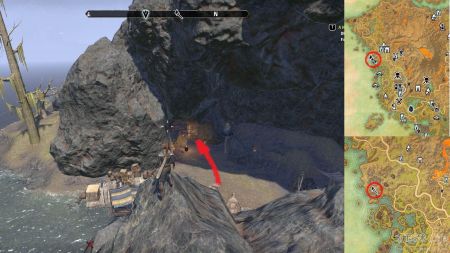
On an isle facing the Sea of Ghosts
The name of this one tells us it is on an isle. This is not really helpful, considering there are vast number of them in Vvardenfell. The largest number of small isles are located in the eastern part of the main map, just where we should find this skyshard.
If you pay attention to the eastern part of the map, you’ll spot a large formation of small islands in once place. Head toward this area, and its northern part. There, on the northernmost small island, is where you’ll find this piece of a skill point.
The “Sea of Ghosts” might refer to the vast number of mushrooms in the area. They really dominate the area.
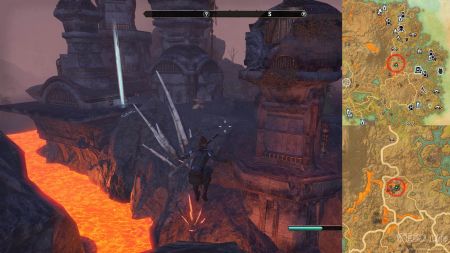
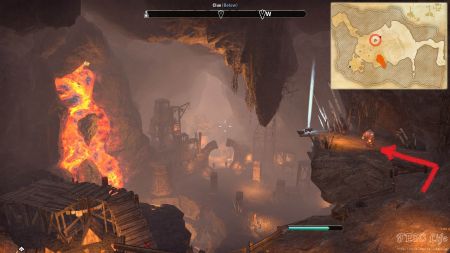
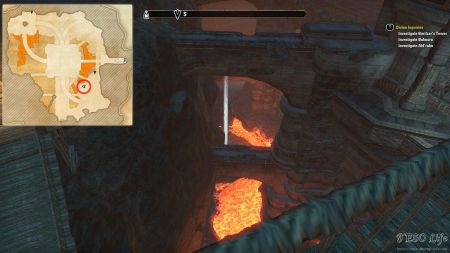
On a Dwemer overhang, above a river of lava
“Above a river of lava” is the hint that pretty much reveals its whereabouts. Take a look at the map and the giant volcano. In its southeastern part, there is a small river of lava. If you zoom in additionally, you can also spot some brown colored structures. Head to the one that is a bit towards the north.
While in the area, you can spot the river of lava going down the mountain. It’s almost as if it goes down in the direction of our skyshard. The brown structure from the map is actually a Dwemer ruin. It hides our shard on a platform, almost above the lava.
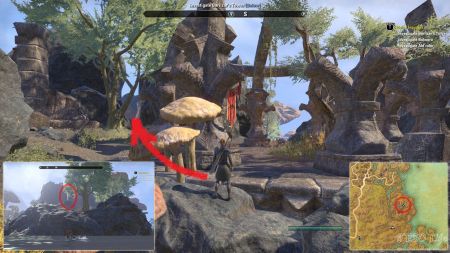
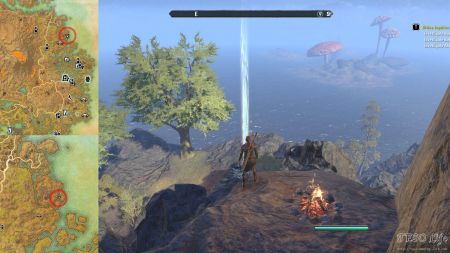
On an outcropping overlooking a grisly scene
There is a rather huge island located here. Head toward it from the west side. If you approach it from the east side, you’ll spot the shard easily, but the route toward it is blocked. You’ll need to go to the island’s western side.
Once in the center of the island, you’ll find yourself among the ruins. Look out for a large tree, just east from the ruins. Next to this tree, there is a narrow passage that leads to a small campfire. The skyshard is below this mark, on a small boulder. Jump toward it, but try not to fall down.
If you look down from this location, you can spot a rather menacing scene. This is where the name might come from – rather disappointing, considering the names of other Vvardenfell shards.
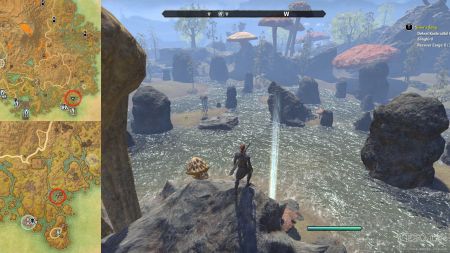
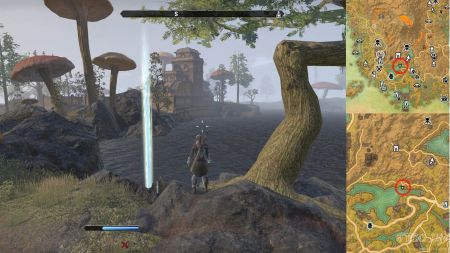
In a hollow stump on the wetlands
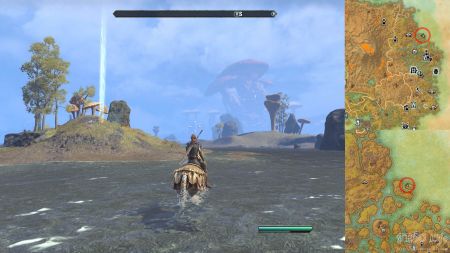
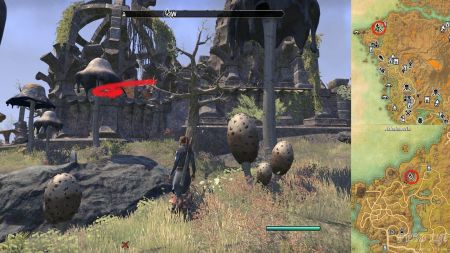
The wetlands mentioned in the name of this shard is what you’ll find in this area. There is a lot of submerged land, with many tiny islands. The stump we’re looking for is easily found. It is on the same island where you’ll find the large stone tower with the circular foundation and rooftop, right next to the large mushroom.
The stump is close to the water, and with it, the island’s coast. If you come from the west, you can see its light from the distance without problems. It could have served as a lighthouse beam, if the water was any deeper.
Withheld at customs and stored in the yard
This one is easy to miss at the start of your Morrowind journey, due to the fact the quests take you out of there and toward the other locations pretty quickly. The exact location of the shard is in the courtyard of the house where you have to talk to Governor Salvi. This is a part of the starting Morrowind quest. While inside the Governor’s office, leave toward the Census and Excise Courtyard.
If you are like me and you like to explore, you’ll spot the shard from the distance by its bright glow. I’ve spotted it from a nearby river. It is just next to the courtyard’s wooden fence. If you decide to try and grab it from outside of the property, you won’t be able to. Trust me, I’ve tried it more than once.
In a stump on the northern shore of Lake Amaya
Just like most of the shards that are set outside, if you are aware of the map marker for this one, you’ll find it easy. The lake we are looking for is the largest one in Vvardenfell. It is also south from the Morrowind expansion “landing point” of Seyda Neen.
Once you find yourself at Lake Amaya, head to its northeastern part. There is a small road following its shoreline. The stump with the shard is just next to another tree, one with a weird looking trunk. Some of its parts almost branch out at a right angle. From this place, you can spot the house with four floors on the other side of the lake. The rooftop of this house almost reflects the image of the large mushrooms found nearby.
In the heart of crumbling Daedric ruins
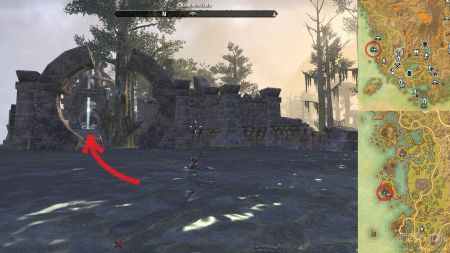
If you find yourself in this zone, you’ll spot two areas of interest close to each other. The southern one is Ashalmimilkala, while the one in the north is Aleft. They represent old Daedric ruins. Go toward the southern one.
If you approach it from the south, the skyshard’s glow will become noticeable as you are about to enter the ruins. There is a door on this side, with a frame shaped like a semi-circle. It is as if the idea was to combine the glow and the frame into a perfect shape.
A decent number of Vvardenfell skill points are located near the seashore. Not a coincidence, considering that the coastline is rather long.
On a stranded rock in a river of lava
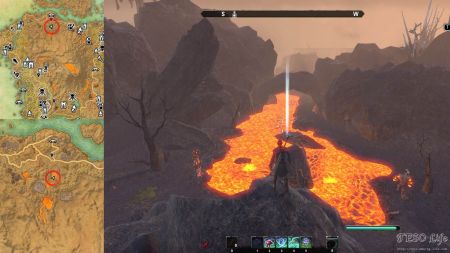
The river of lava we are out for is part of the island’s northernmost lava formation. Even during the day, this area is dark. This comes as a plus when you’re searching for skyshards.
Head south from the northernmost area of interest. Soon enough, you’ll spot the river of lava and a couple of small islands on it. One of them is home to the skyshard. But try not to show your enthusiasm by jumping into the lava and swimming toward the main rock. I can confirm, thanks to events that transpired only to prove this point, that it will most likely cause death. Although it doesn’t look like it, I’ve been able to climb this rock on one side only – the west. Be sure not to repeat my mistake, and save one soul gem.
Beneath the Dwarven bridge
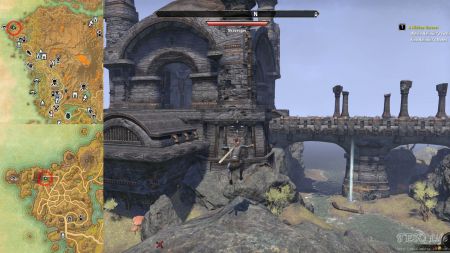
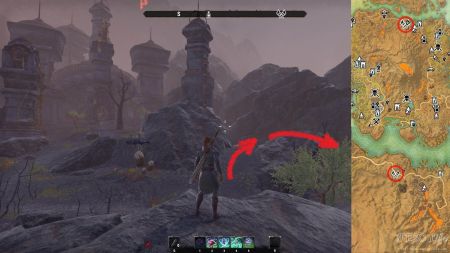
This zone is probably the most densely-filled with roads. If you open up the map, look for a structure marking just east from the “eye” icon. This structure is a tall building, that is only reachable by a long bridge from the eastern side. The final outdoor skyshard is on its southern side, next to some metal pipe, close to one of the bridge pillars.
You’ll find the rest of the skyshards (numbers 11 through 18) indoors, in public and solo dungeons. The first ten were easy in terms of not fighting anyone to grab them, while the last eight are easy in terms of their locations being marked on the map as dungeons.
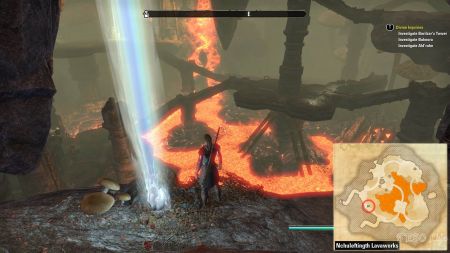
On a treacherous path overlooking a sea of fire
Strangely or not, you’ll only find this dungeon, its wayshrine and the Erabenimsun Camp forge to the south of this area. Not including the volcano, this is probably the area with the lowest point of interest density in the expansion. Follow the road south from the Wayshrine, and you’ll end up straight at the entrance. If you speak with Neramo, who stands near the front door, you can accept the dungeon quest called “The Heart’s Desire”.
While inside, you need to find the central room, the one that has a lot of lava and the metal platforms. In this area, called Nchuleftingth Lavaworks, climb toward the southwestern platform. There will be a group of enemies close by. You’ll need to defeat them in order to grab the shard. They are persistent and will not back down.
The shard’s glow shows up only when you come really close. If you were to search for it while on the other side of the room, you’d have difficulty spotting it. The platform where it lies is a natural formation, not built like the other metal platforms.
Heaped onto a cart of stone left on a precarious perch
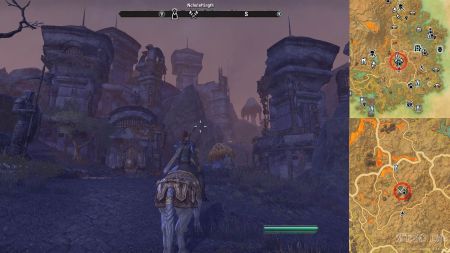
The entrance to Forgotten Wastes is just next to the main road. You can’t really get lost here, as it is not as wide as you might think it is. The dungeon’s front door is part of a larger building, the one with high towers. In the southern part of the island we have mushrooms, and here we have this type of towers.
At the start of the dungeon, you can accept the quest “Echoes of a Fallen House” from Tythis Nirith. The first step guides you toward the second room, where we are headed. Just go south in the first dungeon area, and find the Caverns of Koguruhn.
The skyshard is inside the Caverns of Koguruhn, just north from the lava, on top of the higher level platform. There is a small wooden beam that leads to it, so be careful with the steps. You won’t be grateful for the fall, especially when you want the prize right away.
Nestled with glittering treasures where the red crystals glow
Khartag Point entrance is approachable from the seashore side. It is hard to miss, as there is a small pier outside, and other small elements that point toward the human factor in the area. Find Nakhul nearby, he will give you the dungeon quest “A Smuggler’s Last Stand”.
As you enter the dungeon, keep to your right. Keep going this way, until you spot the second turn on your left. There is a long cave room, just before you reach the flooded area. There is a bright blue color coming from the crystals at its entrance. At the end of the tunnel, you’ll spot the red crystals, and their glow.
Hidden deep within a shrine to the Price of Corruption
There is a large ruin just west from the Urshilaku Camp Wayshrine. Go up the stairs, and find a small passage that leads to the eastern side. This passage has a lot of pillars on the sides. It leads to the metal, round dungeon door. Go through them to enter the dungeon.
Head northeast from the dungeon’s entrance. There is a small map arrow pointing toward the second area. Proceed there, and inside the next zone, you’ll reach a small access corridor that leads to the southern side. It is found on the ground level, close to the water. Follow the path to the southernmost room. Defeat the Worm Cults who pray to the shard to acquire its power.
Where cliff-striders bask under golden rays in their den
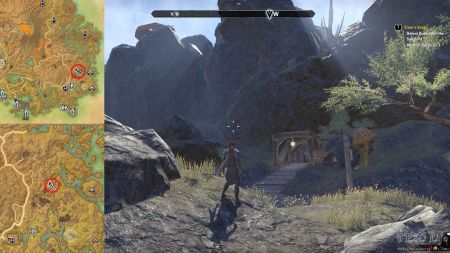
Follow the southwesternmost path in this area. The entrance to the dungeon is approachable from the road. It’s a tiny wooden door, between the rocks, close to some medium sized mushrooms. The dungeon quest called “A Hidden Harvest” is given by Halinjirr just before the entrance. Although it won’t lead you toward the shard at the start, the additional experience is always nice.
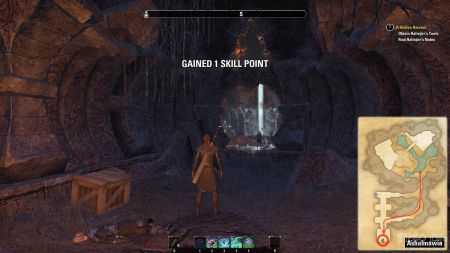
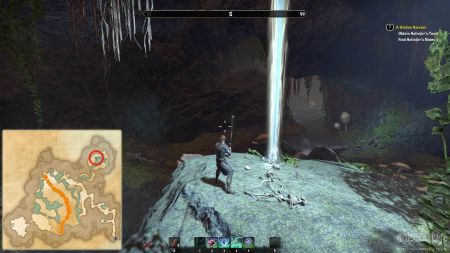
If you are in the dungeon for the sole purpose of finding the skyshard, head to the northeastern part. On the ground level of the main central room, there is a waterfall that hides a passage behind it. Go through it, and get through the small tunnel.
The golden rays in this case are the sun’s radiance, just on top of the platform where the cliff striders dine. According to the bones, you were the lucky one.
On an islet in the subterranean lake
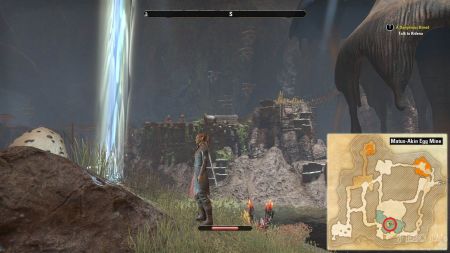
The dungeon’s front door is approachable from its eastern side. There is a wooden path that leads toward what feels like an abandoned mine. You can’t see it if you come from the nearby road, as it is hidden behind the hill. It turns out that this is a mine, where you can produce an abundance of valuable kwama eggs. If you talk with Ridena Devani in front of the entrance, she can give you the dungeon quest “A Dangerous Breed”.
There is one large dungeon room, with water in it. Head to it – it is located in the southern cave area, on a small plateau in the center of the pond. Watch out for the fall, as this part of the cave is on a slightly lower level than the rest of it. There are no enemies near it, but there are plenty of them on your way there. Some would say even surprisingly more than you would expect in a solo dungeon.
In a cozy bandit’s den
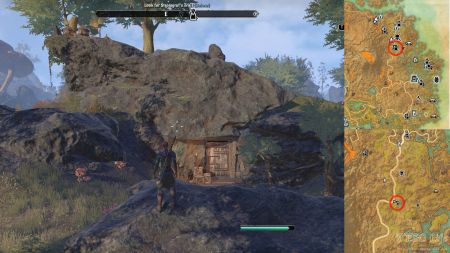
If you take the main road in this zone, the one that follows the eastern side of Red Mountain, you’ll end up passing by the dungeon’s entrance. There is a small wooden door in the rather large boulder, just next to some boxes, close to the main road. This is where you need to go, to find and talk to Bulag Idolus as a part of the main quest. Bulag is found on the first large platform, close to the entrance. During the first interaction with her, you’ll choose her fate. You can either spare her life or kill her.
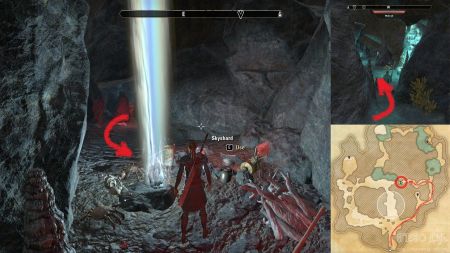
While in the Bandit’s Cave, we need to find a cozy part of it. This small portion is located in the northern part of the delve, not including the front entrance tunnel. While inside, keep to your left all the time. You should spot it after the first crossroad, several steps further inside, on your left side. The cozy part becomes immediately recognizable. The owner of this spot has decent taste, and it feels like the most fun part of the cave.
In the deepest depths of a subterranean Dwemer ruin
The entrance to Nchuleft is not close to a road, like many of the previous ones. To spot it on the map, you’ll need to be close to the lava northeast from Red Mountain. There is only one way to approach it, from the east. The entrance is barred by a small circular metal door, at the tall structure. Behind it you’ll find some sort of heavy manufacturing facility once lead by the Dwarves.
As you enter the dungeon, turn right, then take the first left. There, you will find doors that lead to the other area. Go through them to reach the Nchuleft Depths. Once inside the next area, step on the closest wooden bridge and look left. The skyshard is next to the lava, at ground level. If you manage to jump into the lava, you won’t suffer fall damage, but be sure not to stay in it for too long.
There is also another way around, a bit safer, but far less fun. Who likes it safe, when you can perform lava sky jumping?

Your map pins are way off…
Thank you for pointing that out. We’ve introduced some enhancements and this should be fixed now and skyshard locations much more precise.
Wonder why these wayshrines aren’t listed in the achievements for your char.
They are listed under marrowind, not listed with other shards
Much appreciated.
A quick suggestion. On the main map you should add the wayshrines for reference. Still, for me this is the best website for ESO material on the web. Thanks.
Isn’t the ‘Sea of Ghosts’ just the name of the sea?