Atop a pile of rancid flesh.
This is the same area where you can find the Arboretum Armory crafting station. The set you can craft here is called Redistributor. It offers additional Health, Stamina and Magicka for wearing 2, 3 and 4 items. When you have all 5 items, a nearby ally will be healed as you heal yourself while at full health.
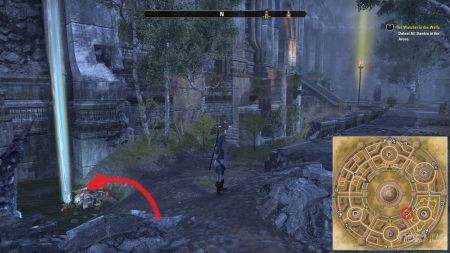
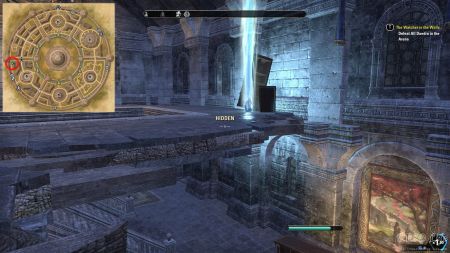
The exact location you should head to is in the northwestern corner, in the water. There is a small pond, close to the central wall. The pile of rancid flesh doesn’t seem like something worth searching for. It is a rather small pile and hard to notice. This is due to the fact that this small pond is a bit lower than the rest of the area. The shard’s glow is hard to spot from the distance. It only started to glow as I was coming close to the spot. If you’ve looked at the map, you’ll find it easily. It is the lonely corner, with no enemies nearby.
Cheap seats at a pit fight.
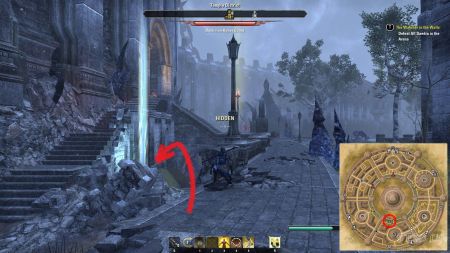
This one is found in the open, and there is no need to enter the sewers. To find it, you’ll need to head to the eastern part of the Arena District, just a bit south from the Ethereal Trophy Vault entrance, the one where the Ebonheart Pact base is located.
You’ll spot a large blue-ish spiky rock in this area. There are small stairs that lead downhill, with a couple of enemies nearby, and a short stone pillar with a lamppost. The districts are not large areas, and it is generally easy to find all the outside skyshards.
The shard is on a small platform, just next to the stairs. The nearby enemies will stop you from collecting it. Watch out for the patrolling one, as he is a bit tougher than the rest of them. You’ll understand the name “Cheap seats at a pit fight” as you look down the stairs. There are two friendly NPCs fighting each other there. They don’t seem to be enjoying it, so you can set them free.
In the Garden’s darkest corner.
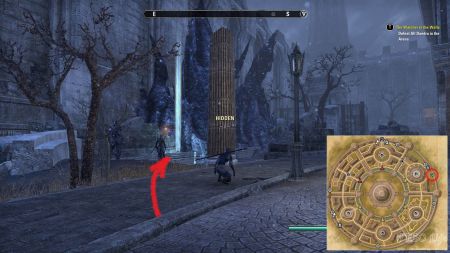
The darkest corner mentioned in the name is found in the northeastern corner of the district. While on the eastern side, follow the water and go north. At one point, you’ll need to leave the water. The corner you are after is on the level lower than the nearby main district platform. If you spot the lamppost, look down from it. You should be able to find it in the pile of rubbish. There are some enemies on the way there, but nothing you can’t avoid.
If you fight for the Aldmeri Dominion and die in this district, you’ll be resurrected at its Rally Point, just a couple of steps west from the shard. This is also the richest area in terms of shards. There is one more nearby, in the other district.
From the river to the grave.
The exact location you want to go for is in the southwestern part of the Memorial District. Follow the water to the west side. The shard is actually not in the water, but on a small dirt area, right in the corner of the district. This area is just under the main district platform, on the lower level.
The part of the name that refers to a grave is still confusing me. I can understand the first part, as the river leads to this spot, but I didn’t see a grave. There are some doors just above it, maybe they lead to the some sort of mausoleum?
If you are up for more exploration in the same district, you can find the Memorial Armory crafting station in the northern part of the district, just west of the Imperial City Prison dungeon. You can craft the Armor Master Set there. As the name suggest, this is where you can craft the set that increases your max health, physical and spell resistance. The 5 items set bonus is quite interesting. If you have the armor ability equipped while wearing the complete set, it increases your max health by 5%, and if you use this spell, you also gain additional physical and spell resistance.
The most eminent nobles live upstairs.
While in the Nobles district, head to its northwestern part. Like many other outdoor Imperial City skyshards, you’ll find this one outside – but there’s a little twist. It is inside a building, on the first floor. The nobles like their houses big. The one you should go in is the only one in this part of the district. It is surrounded by roads. The entrance I used is on its eastern side. There is a small crack in the wall. Use the stairs and climb to the first floor. Look for a couple of empty bookshelves. It looks like this was a nice house before it was ruined. The pictures on the ground floor look untouched. For some reason, they are interesting to see, wherever you find them.
In the same district, you can also find the Nobles Armory crafting station. You can craft the Noble’s Conquest Set here. The set bonus offers additional max health, stamina and healing taken boosts. When you wear the whole set, an ability activates once you interrupt a casting enemy. It gives you a heal and increases the damage enemies take for a short period of time.
Near contested holy ruins.
The exact spot in the Temple District you should go to is in the northern part of this section. It is really close to the Caption Point of this district. If it is contested, the enemies that guard it will attack you from a distance. This would be a hard to obtain shard if they were more persistent. As soon as you jump toward it, they’ll stop doing it. I don’t know if this is because this area is lower than the bridge the enemies are defending, but I’ll take it anyway.
While in this area, you’ll spot the large stairs that lead to the center of the Imperial City. Just next to them, among the rubble of the ruins, is the main prize.
There are no crafting stations in the district. You’ll only find the Monstrous Tooth Vault and the sewers entrance here.
Darkest alchemy, bought in bulk.
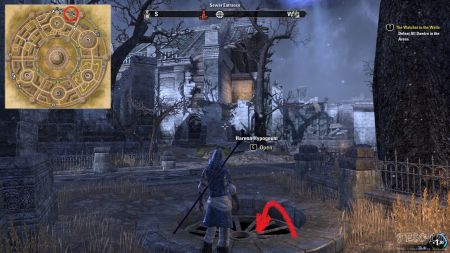
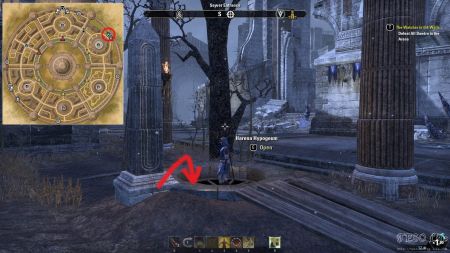
The sewer entrance you want to go through is in the Memorial District (northern Imperial City). The entrance leads to Harena Hypogeum. Go to the west from there. Go to the southern part of the second large room. There is a large stone pillar at the center of the room.
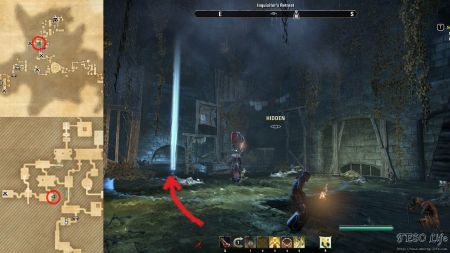
“Darkest alchemy, bought in bulk” are actually alchemical things scattered around on the ground, carts and more. The nearby enemies can be avoided using stealth. Be sure to avoid the patrolling one, as he is the most harmful one. With the help of the weaker enemies you can quickly become overrun.
This area is also called Buried Artifact, it is where Xivkyn lord Wadracki searches for a long forgotten power. If you go north from here, you can find his room. The area where the group boss Wadracki resides is just north from here, in the second room.
Where laundry never gets dry.
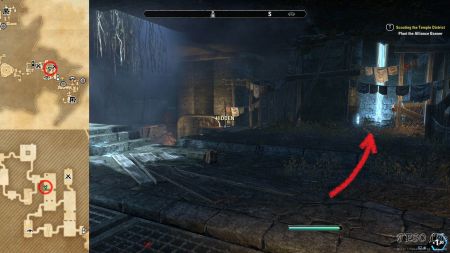
If you are not in the sewers already, head to the Arena District. Find the Harena Hypogeum sewer entrance, located in the northeastern part of this section. Once inside the sewer, go to the next room and left (west). Follow the path to the south, toward the seventh shard’s room. Keep following the path to the west and enter the next area, called Antediluvian Vaults. Keep to the southwest again, until you spot Ebral the Betrayer, the group boss. Don’t go toward him, but to the third room east of him. You can spot the laundry drying inside. This is a bit odd, considering it is a rather moist area. Does the laundry ever really get dry here? Nonetheless, the shard is just next to the wooden ladder that leans onto the beam that supports the laundry platform.
The enemies found in the room can’t be skipped. You’ll need to deal with them if you want to collect the shard. As always, watch out for the patrolling enemy, as he is the strongest one of them all.
An Aldmeri outpost, lost to crocodiles.
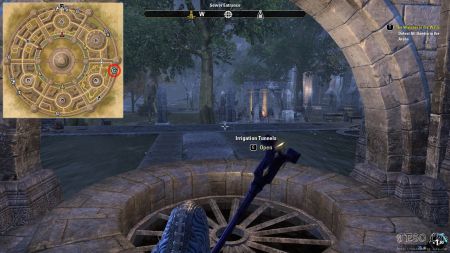
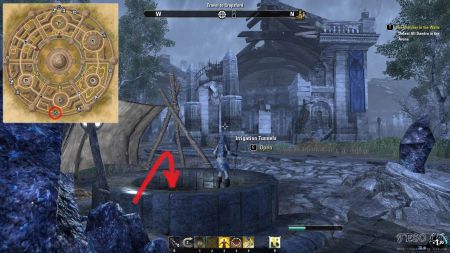
If you are outdoors in Imperial City, go to the Arboretum District. You’ll find the Irrigation Tunnels sewer entrance in the northeastern section of this part of town. There is a small room that hides the circular sewer doors. Use it to reach the part of the tunnels closest to the shard.
Once you’re in the Irrigation Tunnels, head to the Drain-Dweller’s Outpost area of interest. Enter the circular room south from this POI, and go east. Be careful with the enemies in the next room, on the ground level, just behind the wooden wall. They are not that strong, but if you don’t want unnecessary fights, you can avoid them. This doesn’t include the crocodiles defending the crystal. They come in groups of two, and are not easy to defeat. Maybe this one got its name from the fact they always respawn, no matter how many times you kill them.
Dozing in the portal-light.
Although the sewer ladder leads to the Irrigation Tunnel, we’ll need to head to the Abyssal Depths. The door to it is found just northwest from where we start our journey. As you go through this door, and enter the new area, you’ll spot the Emperor Leovic group boss room. We don’t want to go there, but to the room just west of it. You’ll find what you’re looking for in the southwest part of this room.
The portal light mentioned in the name might be the glow of a nearby Daedric Portal, or the light coming from the ceiling. There are some laundry ropes in this area. It seems that the inhabitants of these tunnels really like to keep themselves clean and tidy. It doesn’t feel like the best place to dry your clothes, but it is far better than the previous one.
The shard is slipping down the drain.
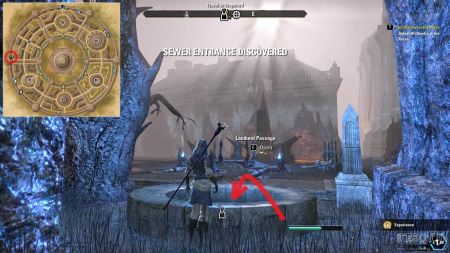
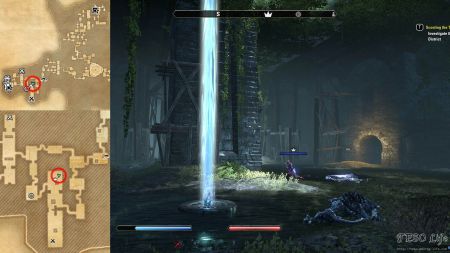
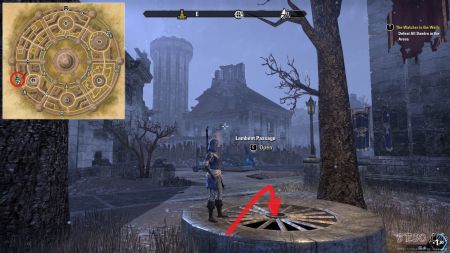
Go southeast from the Lambent Passage entrance. You can find the General Zamachar group boss room in the southern part of this area. Head north from his room, into the room with the high ceiling and a large central stone pillar. There’s another sewer drain in the northern part of the room, in the middle of a small pool.
It is just on top of the drain, slightly slipping into it. We are lucky to find it here – like the name says, it could slip down the drain soon, in a couple of hundreds of years. Beside the patrolling enemy, the others found nearby are fairly easy to kill. This area is also described as Nocere Oblitus, where the cruel wards of Zamachar nurture only the strongest foes.
This cistern contains the heart of a lion.
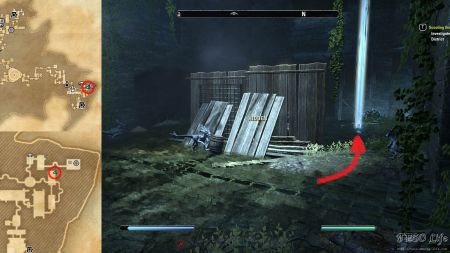
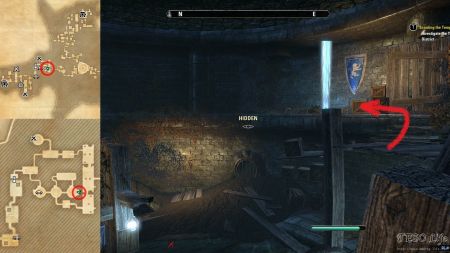
We need to reach the Vile Drainage from Lambent Passage. The door to this area is found as you head toward the center of the sewer. It is the first door you have to pass through in order to continue your journey. As you enter the Vile Drainage, head toward the Bloodmist Slaughterhouse. Within the second room, east of it, is another circular room. Find a flag with a lion painted on a blue background on top of it. Get to the platform with it, next to some wooden boxes. If you’ve pulled some of the enemies before this part, you can just jump on this platform, and they’ll stop the chase.
The “lion” part of the name is clearly not a mystery once you find it, but the cistern part was a bit confusing for a moment. Maybe the circular room reflects something that should be a cistern. I am out of ideas for this one.
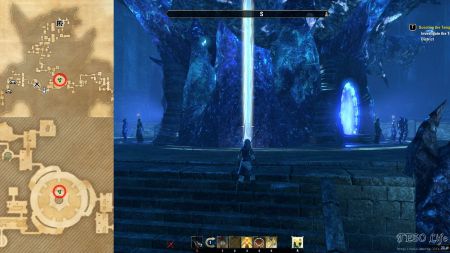
The deepest depths where the Tower grows roots.
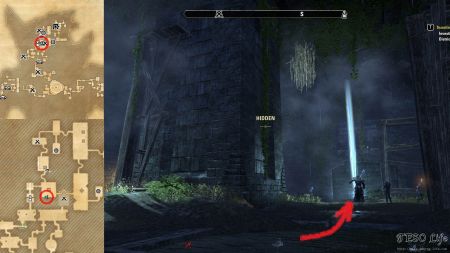
Unlike the previous 12 shards, you might get killed on your way to this one. Be sure you haven’t died recently, just so you can resurrect on the same spot, without being teleported to another location. This is due to the large number of enemies in this area. Someone might think it is understandable, as we are so close to the “deepest depths”.

This was amazing! Thank you for taking the time
Very detailed excellent map location thank you