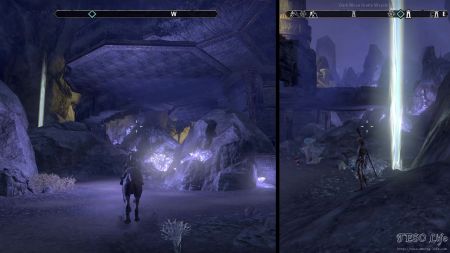
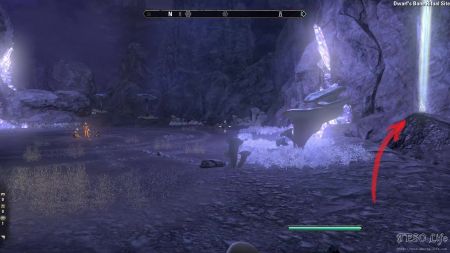
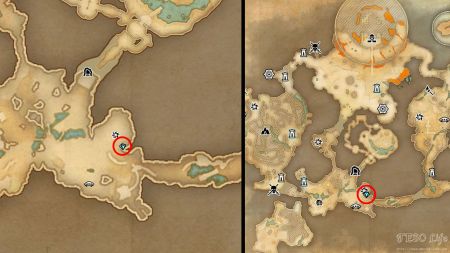
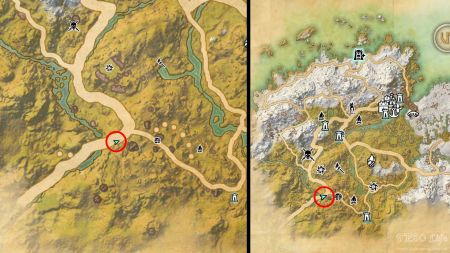
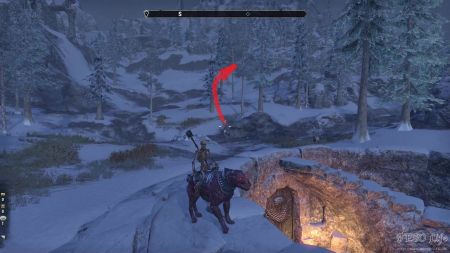
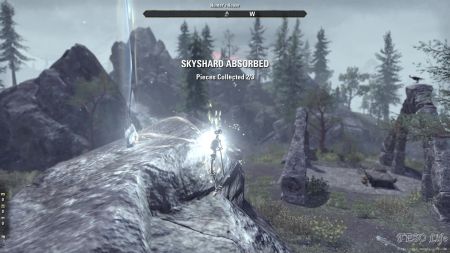
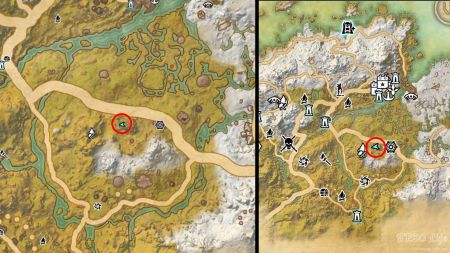
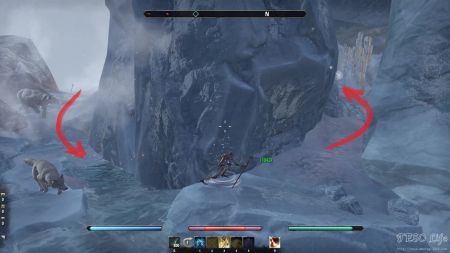
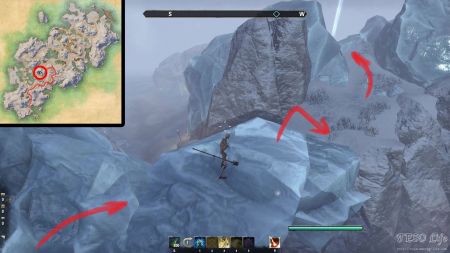
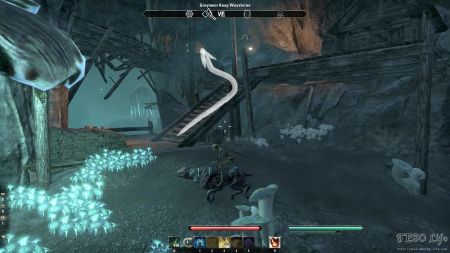
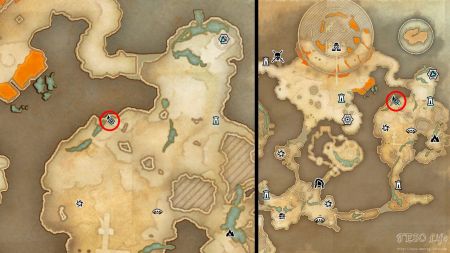
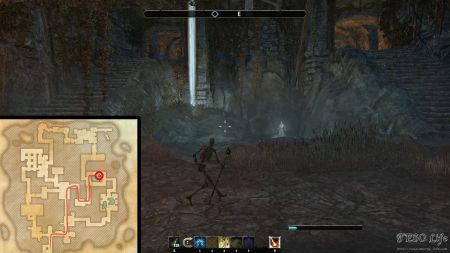
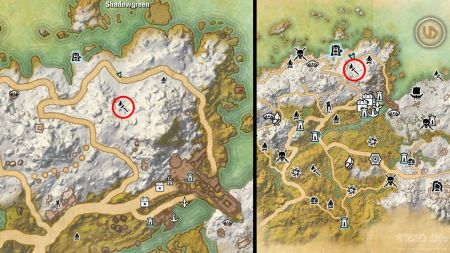
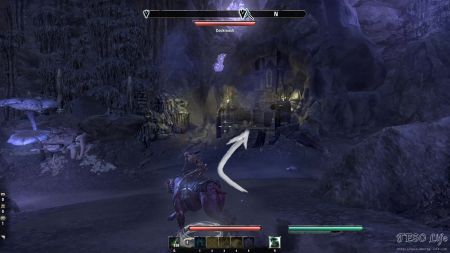
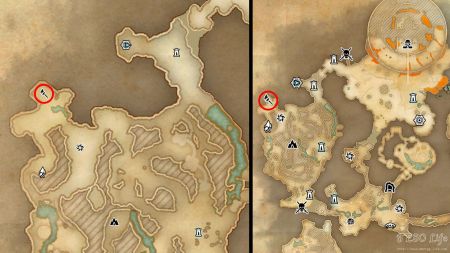
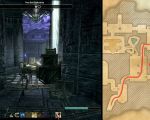
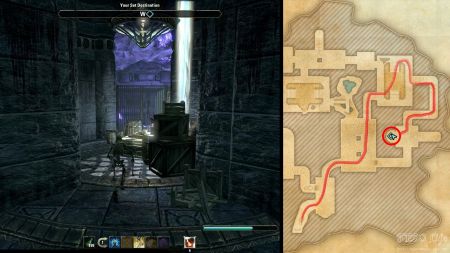
At the top of a waterfall in the Lightless Hollow
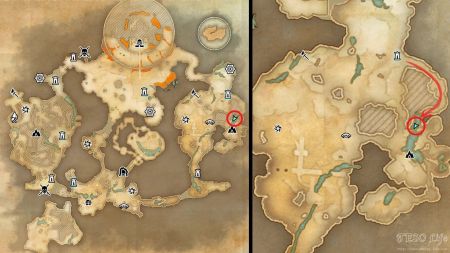
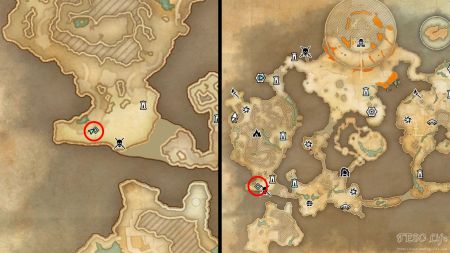
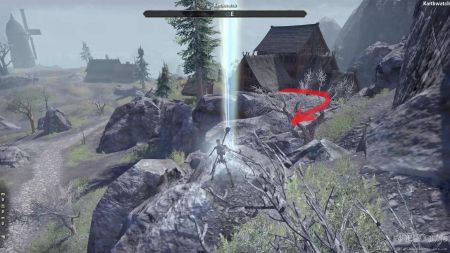
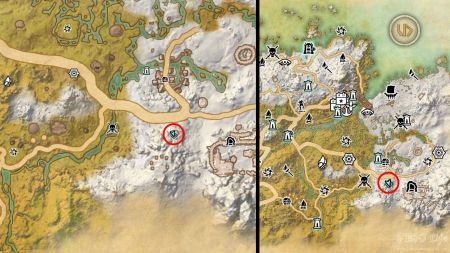
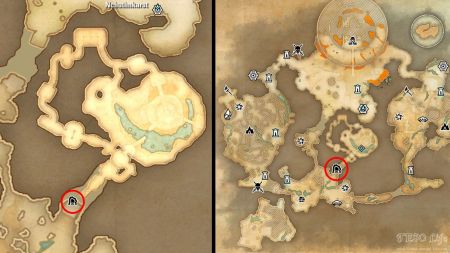
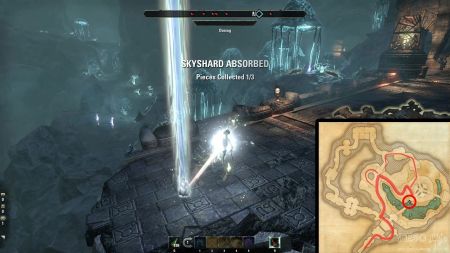
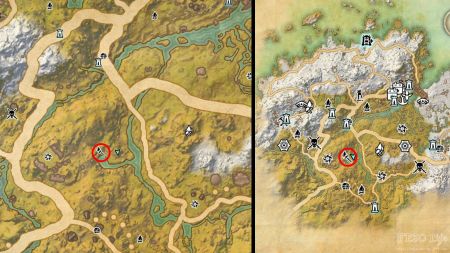
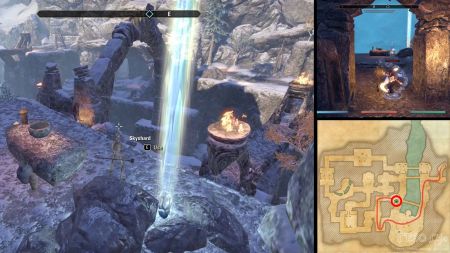
If you follow the road east from the Morthal settlement and its Wayshrine, you’ll pass the Hailstone Valley ritual site and notice a small stone gazebo with a lever at its center. Interact with this lever and you’ll reach the east part of Blackreach: Greymoor Caverns. Just south from your landing location, you’ll find the Lightless Hollow Wayshrine. This is your first “checkpoint”.
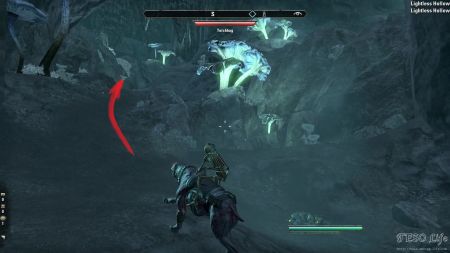
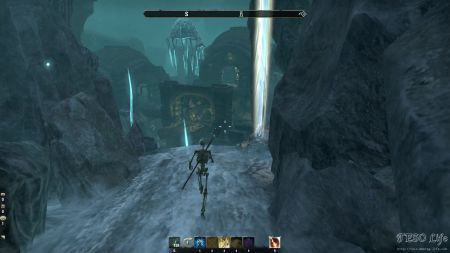
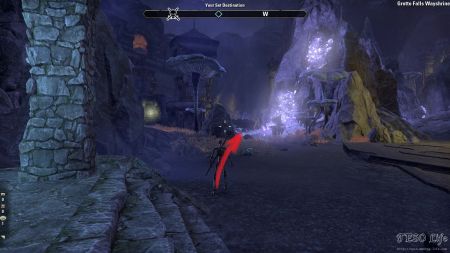
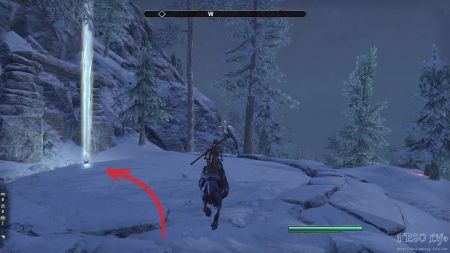
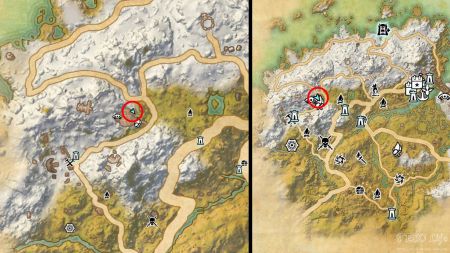
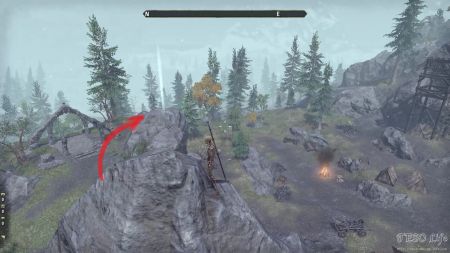
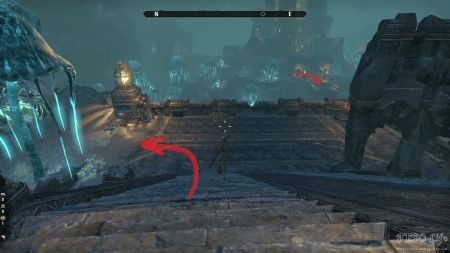
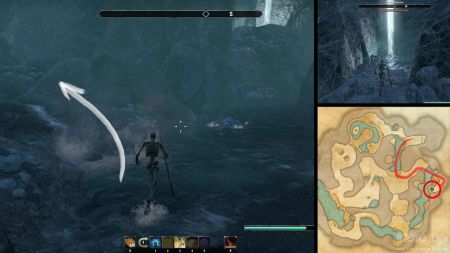
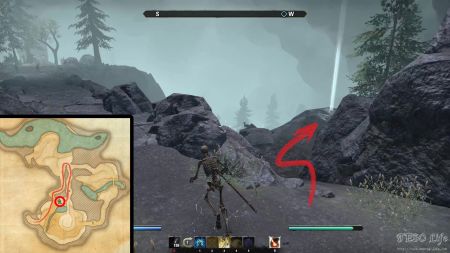
From the Wayshrine, follow the road south by sticking to the eastern part of the caves. If it’s easier, keep to your left here the whole time. The goal is to reach the end of the longer passage where the waterfall starts. Once you enter this passage near the Wayshrine, you are pretty much set, as it takes you straight toward this spot. The shard is on the rock that divides the waterfall into two streams, close to the edge, so be extra careful.
Tucked in the Dwarven ruins south of Dark Moon Grotto
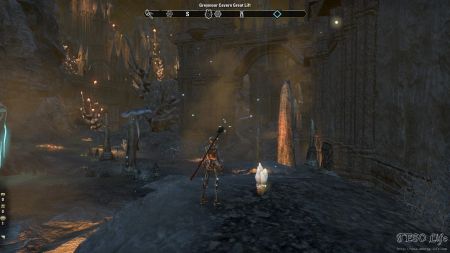
Once you use the lever to set the lift in motion, it’s going to take you to Blackreach: Greymoor Caverns and its western part, right at the Dark Moon Grotto great lift. The Dark Moon Grotto mentioned in the title is a place of interest that’s, of course, a cave. It is placed at the center of this part of the map. From the Dark Moon Grotto great lift, head south all the way down. You’ll pass by the Dark Moon Grotto and its Wayshrine, and eventually reach its southernmost part where you can discover the Grotto Falls Wayshrine and the Colossus Charging Station world boss.
From the Grotto Falls Wayshrine, look to the southwest, and you’ll spot some stone structures. Go between the large boulder and a mushroom cap, and soon enough you’ll go down a small hill. A little plateau will take you underneath a larger platform, also made of stone. At this point, you should notice the beacon light from the shard we are after. It is just between the cave wall on the south, and a small pond on the north, just below the stone stairs that lead to the platform above.
Near the outer walls of Greymoor Keep
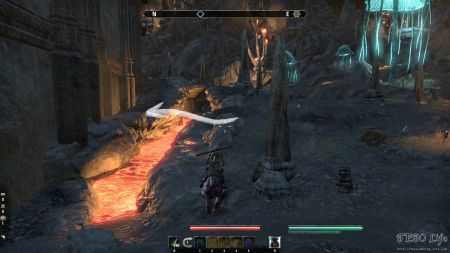
After you’ve used the lift’s lever, you’ll find yourself in the northern part of Blackreach and the Greymoor Cavern Great Lift. Head north and find the Greymoor Keep Wayshrine. The outer keep walls mentioned in the shard’s title are the first line of defense of this, the largest and northernmost structure in Blackreach. Our final goal is a part of the outer wall with a lava pool next to it. There are four of these pools close to the outer wall, and the one we’re aiming for is the easternmost one.
From the Greymoor Keep Wayshrine, continue north toward the keep. Try avoiding getting close to the closest pond, as it’s a long way down from there, and you might not survive the fall. Find a path that leads downhill and you’ll be fine. Follow the path to the northeast, past two large stone towers. As you get close to the easternmost lava pool, you’ll notice there is a large gap between the platforms on the opposite side. The monsters here like to slow their targets down with their first attack, so keep that in mind when trying to jump over the lava gap. I’ve made the jump near the gap’s western part, and even with the slowdown, it barely took me over. From this platform next to the outer wall, head north, and soon enough you’ll spot the skyshard’s location.
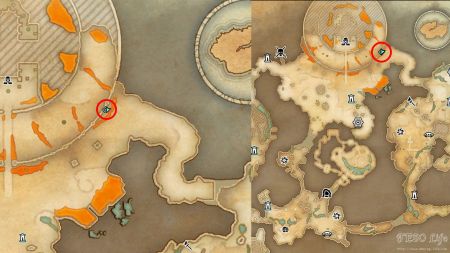
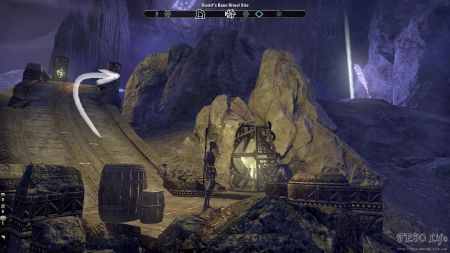
Where a storm is brewing east of Dusktown
The brewing storm is actually a place of interest called Dwarf’s Bane. This ritual site is positioned just south from the Nchuthnkarst public dungeon, east of the southern part of the Blackreach cave system. As you get closer, you’ll spot a small stone pathway with some posts. Follow it and it will take you to the larger plateau where a storm is brewing during the ritual.
Once you climb the plateau at the place of interest and take a few steps inside, you’ll be able to see the skill point shard after rounding the large boulder blocking the view to the east. It is on a small rock, next to some glowing crystals, mushrooms and other cave flotsam and jetsam.
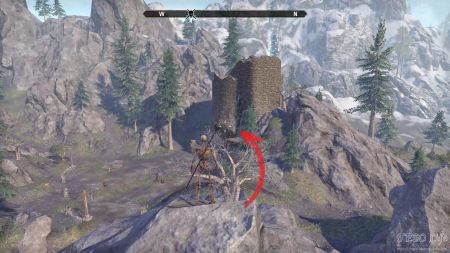
At the top of the Circle of Champions Tower
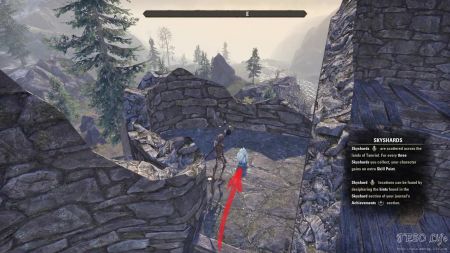
The tower, although hidden next to a large boulder, can be spotted from a distance due to its size and the fact it’s close to the location of the world boss. To reach its ultimate prize, you’ll need to climb to the top. Even though it is an outdoor shard, its glow is still well hidden by the walls of the tower.
I am not sure if this location has anything to do with the guild of the same name, which gathers the greatest fighters of Tamriel, but one can hope. It is nice to see spots like these that tell a story on their own, even if calling its resident Skreg the Undefeatable might lose its meaning and luster after, you know, you’ve defeated him. Does that mean we are now bound to be its eternal occupant until the next poor soul comes to force us out? That would be nice indeed!
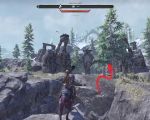
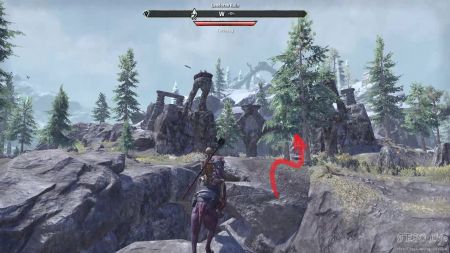
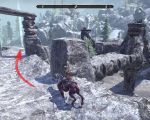
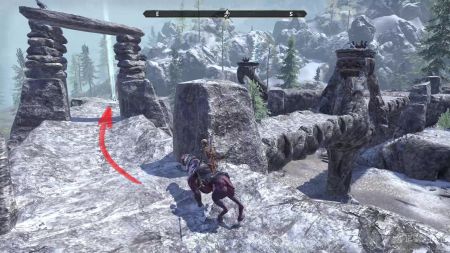
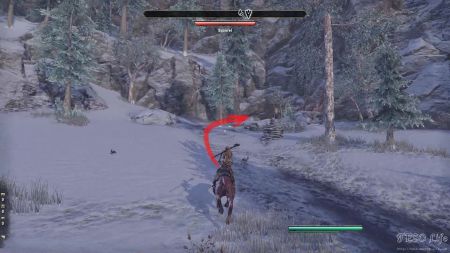
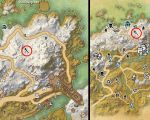
Close to Storm Hawk’s Altar near Solitude
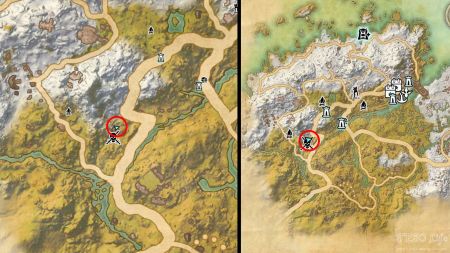
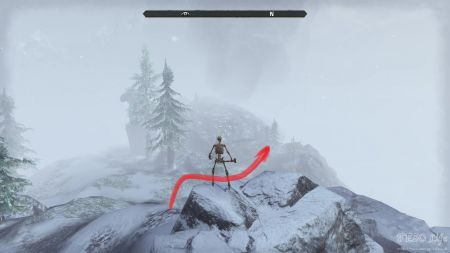
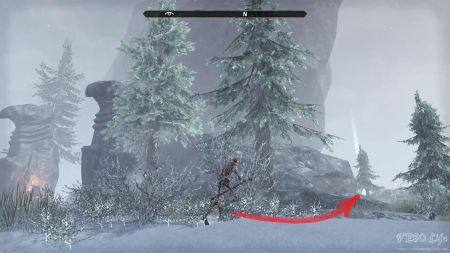
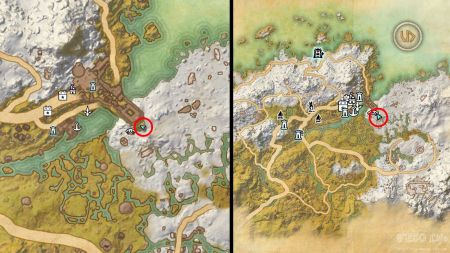
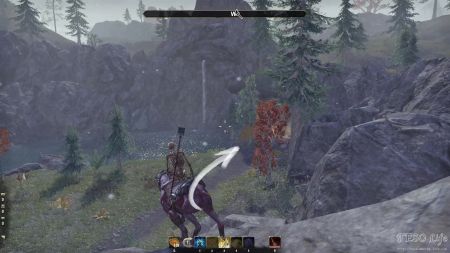
However, said striking locale and our skyshard spot are not positioned inside the town itself. To reach both, you’ll need to cross the river and climb the area just southeast of town, almost below the large arch where it’s positioned. Although this place is not as elevated as Solitude, it gets rather snowy, and the visibility is pretty low. Once at the Storm Hawk’s altar, go east from this Nordic-looking ruin with the two large Hawk statues (and one copy of Anjuld’s Journal) and head around the large boulder. Next to an evergreen tree, you’ll find the hidden skyshard.
It gets rather chilly at this part of the map, but if you are up for adventure, you can find a distant delve in the northeastern part of the map nearby, called Frozen Coast. There is also the Frozen Coast Wayshrine south of it. It can shorten the traveling time a bit as it is the only Wayshrine in the area close to these snowy parts.
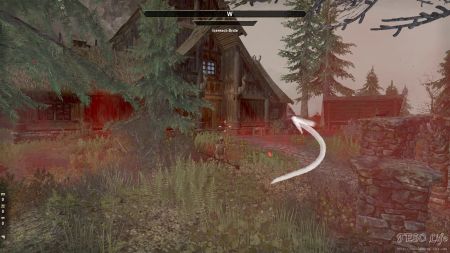
Near Jarl Olfwenn’s Hall
If you are about to hunt this Skyshard solely based on the information from the title, you probably won’t stay sane for long. Don’t bother with trying to find a place of interest either, as there is none with this name. The only clue you’ll find is the name of the entrance to one of the houses – “hall.”
Jarl Olfwenn’s Hall is the largest structure in the Karthwatch settlement. Unfortunately, this place is full of hostile inhabitants, so we can’t really ask around who this famous Jarl Olfwenn was and why this hall was named after him. If you go west from the center of Karthwatch, following a small pathway uphill, you’ll reach this hall. Go past it, to the north, and follow the route behind the house. The shard is several steps away from the hall, overlooking the nearby main road. It can be spotted from a distance easily at any time of day or night, especially if you find yourself on the main path around here. I am not sure if you can climb to the shard from there, or you need to go around and by the hall, but at least you’ll be saved from the pain of looking for the Jarl’s Hall.
Some even say that this place might actually be a town called Snowhawk, which could explain some of the local people and their behavior. But it will be left to the history of Elder Scrolls Online to decide its faith.
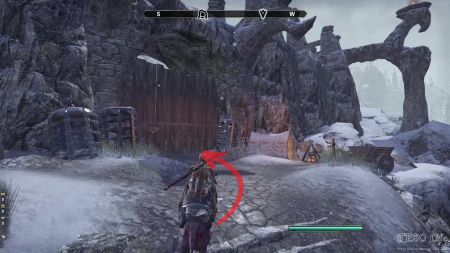
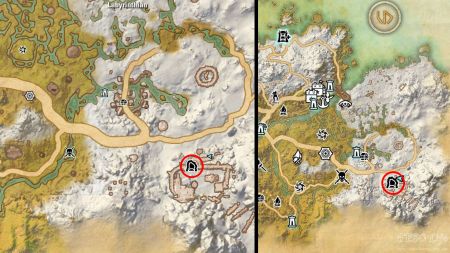
At a henge south of Morthal
Following the road from Morthal, you’ll end up at a crossroad. If you look further south, you can spot a large hillside with no trees on it. Continue forward and look for a small snowy patch on the western side of the hill on the west, the one with many boulders and trees. This snowy patch will take you to the part of the hill where the henge is. You’re looking for a kind of stone arch, made of many small rocks. In front of this arch is the skyshard, concealed in the open, shyly hiding from the eyes of the nearby Labyrinthian public dungeon.
One interesting thing about the henge where you find the shard is that it’s not the only one in the area. Back near the crossroads, a bit to the northeast, there is one more henge-looking type of structure, but this one is not totally buried in the snow. It has a hole in the center, with a staircase and a locked door. The question remains if the one on the hill really is similar to this one, and how old the snow deposits are, as they carry the weight of our shard.
By the Dragon’s Belly
To reach the exact location of the skyshard, you’ll need to enter the Lendoran Ruin, use its many stairs, and climb the walls on its northern side. There, on the edge of the walls of this Nordic ruin, next to the Cheeses of Skyrim: Haafinger book is what we have been looking for.
Looking at this location from the nearby main road, especially from the top of the gap above Dragon’s Belly, one can not help but hold their breath and soak in its beauty. Especially during a clearday, without any snow storms, you can notice that this place has some special value to its present or past residents. It is like layers of crafted history, that start with a crafting station, which is, at its lowest point, inside a gap. This is where you can craft a five-set piece called Dragon’s Appetite Set. It gives weapon and stamina recovery and its 5-set piece bonus: increasing your damage done to Bleeding enemies by a set amount. Dealing non-bleed damage to Bleeding enemies generates a persistent stack of Dragon’s Appetite, up to once per second. After 10 stacks, you consume Dragon’s Appetite and heal for a set amount.
Near an altar close to Hunter’s House
This is also the last skyshard on this list found outdoors. The altar mentioned in the title is important, as you can’t reach the shard in the area of the crafting station. Your exact goal is almost in the middle between this crafting station to the west, and Hjaalmarch Great Lift to the east. The closest Wayshrine is the Morthal settlement one, to the east.
If you are coming from the closest shrine in the east, cross the river and head toward the Hjaalmarch Great Lift. Following the main road, start ascending the hills toward the south. Soon enough, you should spot a small, unmarked settlement with a large wooden tower – a watchtower. Anyone on this watchtower would have a great view towards the smaller hill in the west. This hill is where the altar we are looking for lies. Climb on the hill, and there, on a rock nearby, is a skyshard.
Within Labyrinthian’s Mound
It’s easy to spot this place on the map, as it is a large structure in the snowy area. To enter the dungeon, you’ll have to go over the U-shaped road and stairs. At the entrance, Yrsild gives you the quest The Fading Fire, where you have to find her grandfather Keldnyr, who is missing.
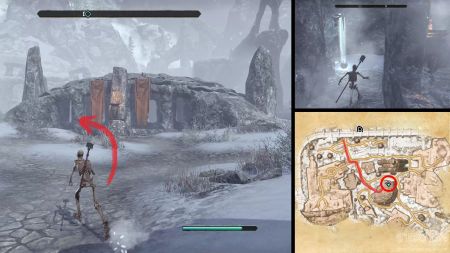
Once inside the public dungeon, continue forward over the long stairs, between two stone structures on both sides, to the left and right. As you pass by them, you’ll get to spot a large stone hut-type of structure with four pillars around it. There are two red flags at its center, next to a fire pit. This is the entrance of this building. Head into it, and keep to your left. As soon as you enter and start going left, you’ll spot the skyshard. Its glow shines above the hut too, as there is a hole in the ceiling.
Overlooking the crescent pool in Nchuthnkarst
There are a lot of lamp posts near the entrance of this dungeon, and even without looking at the map, you can spot that there is something going on in here. The Tones of the Deep is the name of the quest given by Kireth Vanos, who is next to the dungeon entrance. Press the lever to go even deeper and reach the Nchuthnkarst area.
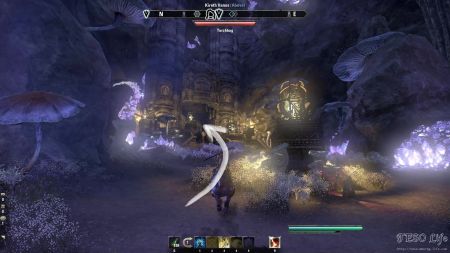
From the entrance, you’ll need to make your way to the first door to Nchuthnkarst Control Room. Considering you are alone in here, you’ll have to deal with a group of enemies. They will definitely follow you, blocking you from going further until they are dealt with first. In the next room, you should go forward to the next door and into Nchuthnkarst Complex, but if you go to the right here, you can see your goal in the distance – a broken bridge on the other side. The skyshard is at the end of said broken bridge.
To reach this broken bridge, you can go around the central room, following the path over the bridge to the north, going under the bridge from its western side, or good old jumping towards it, hoping you’ll survive. There is a large mushroom east of this bridge which you should aim for if you decide to jump down. From here, whichever of the paths you take, simply follow the road and aim for the broken bridge section, where the shard is hidden on the edge, overlooking the crescent-shaped pool.
Through the Frostvenom Spiders nest in Chillwind Depths
The specific Frostvenom spiders nest we’re after is found in the eastern part of this delve. From the entrance, just follow the path to your left side, hugging the wall. As you come across the second pool of water, immediately turn left, and you’ll spot a small cave entrance covered in the spiderwebs. Without the map, this pathway would be rather well-hidden. Go through it, deal with the two spiders that might follow you from the back, and reach the end of the path. Its end is overlooking the water down below, and is also the location of the skyshard we are here for.
If you are a fan of achievements, there is also an instrument in the easternmost part of the delve, the one you’ve just passed several steps ago. It’s a part of the Instrumental Triumph achievement, where you have to collect 19 instruments.
Near the cliffside altar in Dragonhome
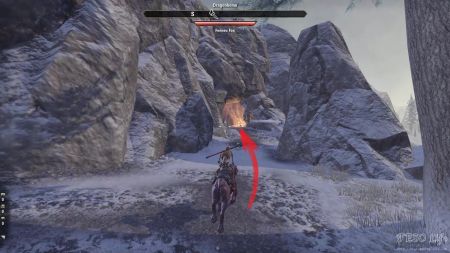
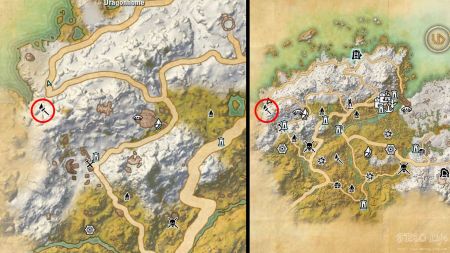
Either way, follow the main road up to the northwesternmost bend, and from there, head south toward the cave with the torches as a light source. There is a rather unique and strange-looking quest giver in front of the dungeon’s entrance, called Heiruna Doll. It gives you the quest called Spellbound, where you have to gather her belongings hidden inside the delve.
The cliffside altar is the one overlooking the eastern delve’s southern bridge, where the shard’s glow is showing its whereabouts. To reach it, you’ll need to take one of the two paths. The closest one is probably the one from the south plateau. There is a small passageway that can take you to the southwestern part of the delve, but it also leads to a small route to the north. This route also ends in a dead end, with the cliffside altar overlooking the path we just passed over. The enemies in this area are adamant in their need to go after you, and you’ll need to deal with them. The skyshard is just on a small rock, next to an altar.
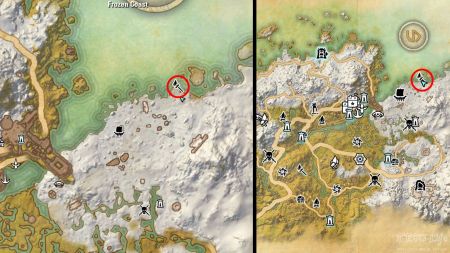
Among the crags of the Frozen Coast
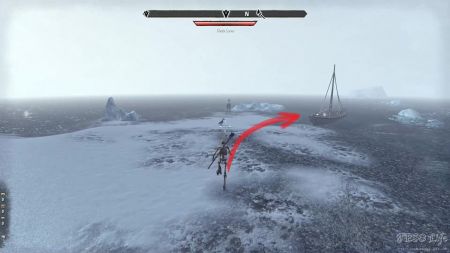
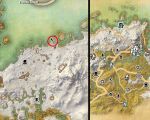
To enter the delve, you’ll need to interact with a boat at this location. If you are a completionist, there is the “The Fate of the Frozen” quest, given to you by the Magreta raider nearby. Once you “use” the boat, it will take you into the delve, which is actually an island that you can find on the Western Skyrim map. It’s the one that is located in the far northeast.
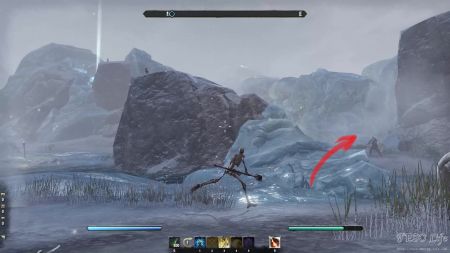
In order to reach the skyshard’s location, we’ll need to follow the main delve road going toward the eastern side of the island. At one point, it takes you past the water into the small cave. This is where we take a hard left, and go north under some stalactites. This path will take you up the hill, to the point where it ends with a small “broken” bridge. If you zoom into the delve at this location on the map, you can spot that this path is actually a dead end. Look to the distance here, toward the west, and you can see the Skyshard’s spot on the other side, as well as a hill. You’ll have to make a jump here to end up a level lower, thereby getting on the hill’s plateau, where the shard is. This is a fairly interesting location for a skill point, considering it even takes a jump to get to this place.
By the Wispmother’s pond in Midnight Barrow
From this, the closest Wayshrine, head straight to the west. Keep pushing in the same direction until you notice the lights of the torches. They mark the start of a path that leads up the hill, over the wooden stairs and the plateaus, and to Alwyn. Next to her, there is a wooden ladder that you can use to climb inside Midnight Barrow delve.
The ancient burial site known as the Midnight Barrow once occupied the side of a hill in Western Skyrim. Centuries ago, an earthquake caused the ground to swallow the barrow, dragging it into the depths of Nirn.
The “Wispmother’s pond” clue is of a lot of help here, as this is not a small dungeon. There are three pools of water inside the delve. The pond we are looking for is the only one in the room. The other two ponds are inside a different room, but they are not our goal at the moment. Continue north, and find your way inside the room with a single pond. There is a Wispmother above this pond that might be the reason behind the skyshard’s name. You don’t have to engage it to collect the skill point, as this spot is approachable if you jump down from the stairs next to it.
On one of the highest precipices in Shadowgreen
This part of the map is surrounded with tall mountain edges, so you best make it here from the northern road. There is an unmarked pathway going toward the delve, which also has stone posts that probably serve as guidance when there is a lot of snow. Follow the path, and you’ll reach the entrance and a wounded High elf named Rafilerrion, who gives you a quest called “The Mountain Bellows”. There is a small cave entrance with some vines on it close to him.
The highest precipice in the cave, the one we are interested in, is visible just above and near the entrance. If you look closely at the northern part of the first room, just above the water, on the top of the hill, close to a bridge, you can spot the skyshard’s light. To reach it, continue north into the next room, and up the hill. Once on top of the hill, inside a small cave, you’ll see two new pathways. One is leading to the eastern part of the cave, and the other one toward the south. Go through the one leading to the south – the one on your right.
At the end of the cave pathway, you’ll reach a bridge. Don’t go over it just yet, but rather pan your view to the right. There is a small, almost imperceptible road. Use it to reach the Skyshard and a new piece of a skill point. Watch out for a black bear that is guarding the bridge, as it will follow you if you get spotted.
In a junk heap rotunda in the Scraps
From the Wayshrine closest to the Lift, follow the path while keeping close to the western part of the cave – to your right. As you pass by the Nightstone ritual site on your left, you can see the yellowish lights of the delve’s entrance in the distance. There is also a large formation of crystals just above the approach. As always, there is a quest giver here. This time it is Neramo, who would like you to gather power nodes.
The junk heap rotunda can be spotted in the eastern part of the delve. It’s a part of the smaller room in this area. To reach it, you’ll have to progress north, to the room in the northeastern part, as the path from the skyshard’s room can only take you down to the starting greater room. Get to the northeastern room, go up the stairs, and into the passageway to the east.
The final room, where the rotunda is positioned, hides a quite unique enemy-spawning technique. Just hope that someone hasn’t dealt with this before, as you’ll quite enjoy it. As you enter the room, look to your right. You can’t really spot it from the entrance to the room, but there is a small, hidden junk heap rotunda here. Go around the left-behind treasures to pick up the most valuable one for yourself, aka the Skyshard, of course.

