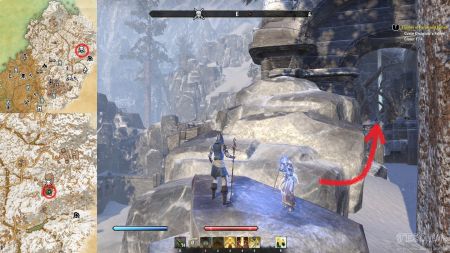
Beneath the ruined aqueduct.
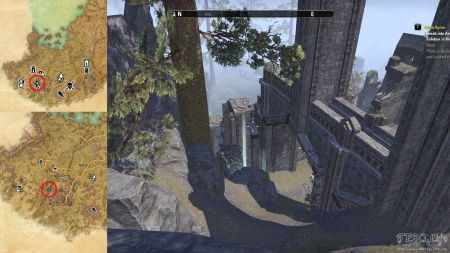
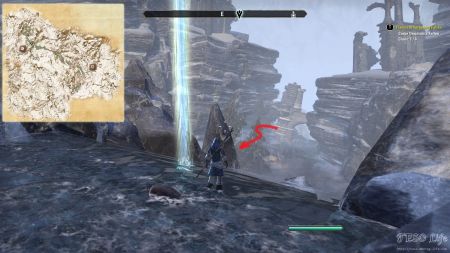
Just like the name says “Beneath the ruined aqueduct” head to the ruins in this area. There are rather tall stone structures – Aqueducts. The shard is conveniently hidden behind one of the Aqueduct pillars. Be ready for a bit of climbing. Aqueducts and shards go well together it seems, since are more than one in this area.
West of the cliff jumper’s falls.
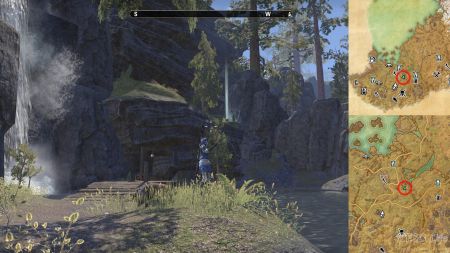
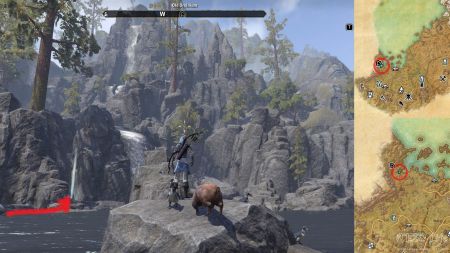
Head toward the largest lake in this area. There is a small island on its southern part. Just south from here you’ll spot a small waterfall. The skyshard is found next to this waterfall, on a platform, above the lake. From a nearby road, head to the platform, and collect the prize.
Smuggled away in Shipwreck Cove.
Although the name suggest it is hidden in some kind of a shipwreck cove, don’t search for signs of any ships. If you follow the coastline you can spot it from the distance. There is a small waterfall just next to it, but this is not that big of a landmark, as there are many of them in the area. If you head toward the coast, downhill from the nearby public dungeon, you’ll stumble upon it without a problem.
On a stonecutter’s scaffold.
If you have reached this part of the map from Merchant’s Gate, this would be the closest outdoor Skyshard. It was the first I found in this zone.
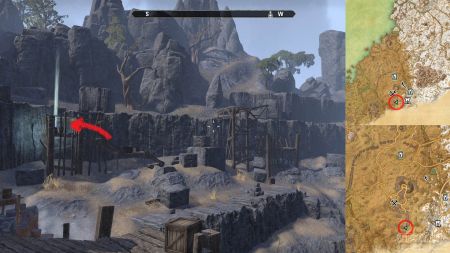
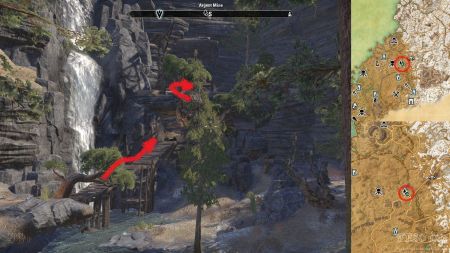
Find the Graystone Quarry and head toward its southern part (it is a rather large excavation operation). The skyshard is hidden on a wooden platform. This is the tallest, reachable area. To collect it, jump between the wooden bars on top of the platform. Although it may not look like it, you can squeeze through.
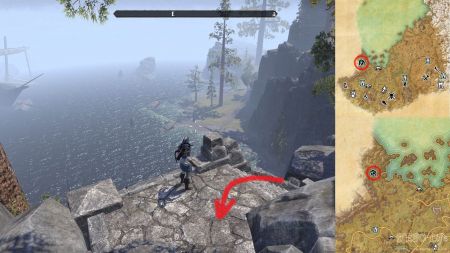
A seaside view from the cliffs of Morkul.
Although it may be considered as being hidden, its name reveals everything you need to know about its location. There is a nearby city called Morkul Stronghold. The seaside view suggests it at least has some view of the nearby sea.
It all comes together once you find it on a small wooden deck, high tide pier, just west from the stronghold. There is a strangely beautiful house rooftop nearby, that almost reflects the close by sea. It is as it was designed to lower the pressure from the wind coming from the sea.
Above the ancient barrow.
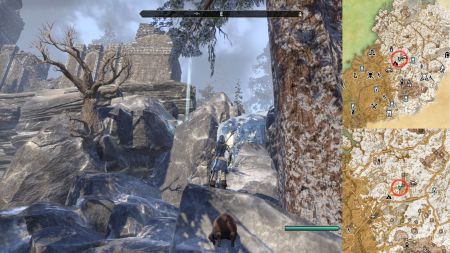
If you look closely on your map, you’ll spot a beige colored structure at this area. Head toward it. If you are aware of the shard in this location, and you don’t bother with reading the guidelines, you might end up entering this building. There is a rather long underground set of tunnels called Exile’s Barrow beyond those doors. You don’t want to end up exploring it, if you just want the 1/3 of a skill.
Instead of going into the ancient barrow, find an uphill path just east of it. Ascend on top of the nearby hill and look down on the building once more. You should now spot the bright beacon you are after. It is just behind a larger stone boulder, close to some annoying harpies.
Lost cargo on a frozen freighter.
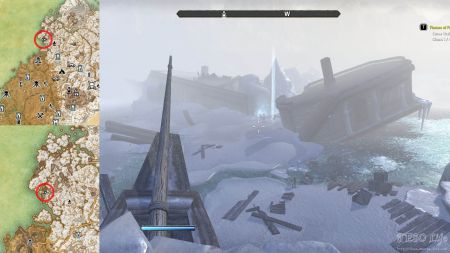
This is probably my favorite place in Wrothgar. As you come close to it, you’ll spot many sunken ships that are frozen in the ice. Unlike other areas in this map, it seems like this one has a smaller amount of hills. It is like a cold, winter desert.
Our 1/3 of a skill point is located at the western part of Frozen Fleet. Look for a sunken ship that is broken in half. There should be a larger ice pillar rising from its middle. The shard is on the ground, almost tucked in. Since you’ll be probably coming from east, it can be seen from far away. Not even the fog in the area can cover it that well.
Atop the frozen waterfall.
If you are on the search for this shard, following the guidelines from its name, you are not going to end up well. Even though the frozen world suggest it is found in the snowy area, it is just not enough. There are too many waterfalls here!
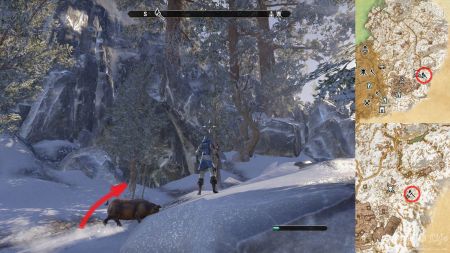
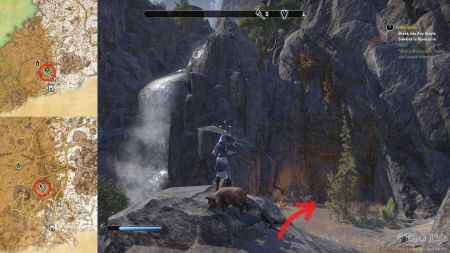
The one we are after is rather close to a road. You’ll probably end up wondering this area anyways since there are almost three nearby map markings, one wayshrine, one place of interest and a cavern. Just west from Forlorn Watchtower – place of interest – follow a dead end road. If you pay attention to the surroundings, you’ll spot the skill beacon, shining from, not exactly a waterfall, but from a nearby rock. Shame on you developers for misleading us…
Overlooking the ice-bound Centurion.
The ice-bound Centurion mentioned in the name, is actually a group bosses from the nearby area.
The area the skyshard overlooks is just south from the group boss. If you are at the start of the boss’s pit, look toward your right. There is a stone structure, just on top of a smaller hill. Climb it and go inside the structure. Almost at the center of it, just next to some trees, on the ground is the shard. I don’t think you can hit the boss from a nearby platform, but why bother when there is a nice field down into the pit where you can die from the Centurion if that is your fancy.
Caught in the webs of the old city.
The entrance to this public dungeon is located a bit further in the mountain. From the south, there is a small passage, under the stone boulder. Follow this path, find the stone stairs and follow them up the hill. In general just follow the mountain line to your left.
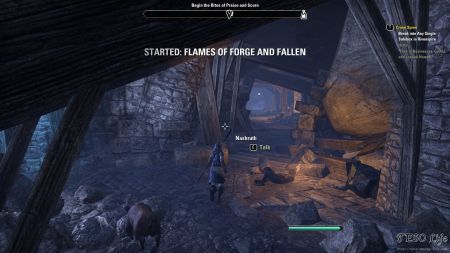
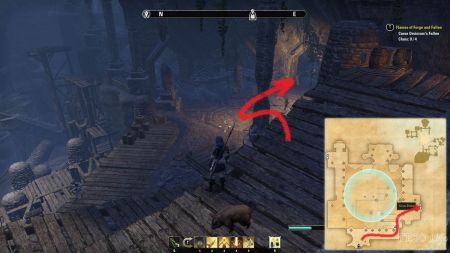
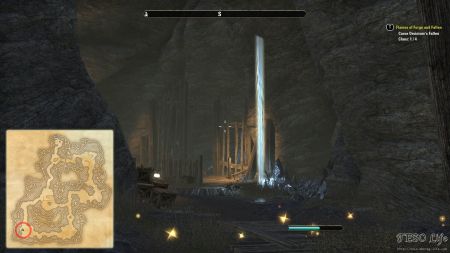
Once inside you need to speak to Nashruth. He will give you the quest called “Flames of Forge and Fallen”. This quest is essential for going through one of the dungeon’s door. You can’t progress without it, and eventually can’t reach the skyshard’s location.
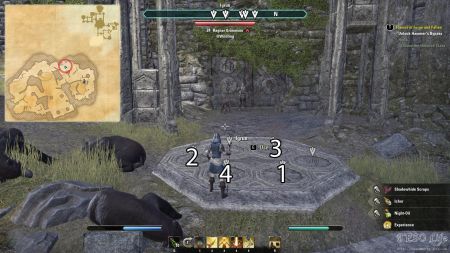
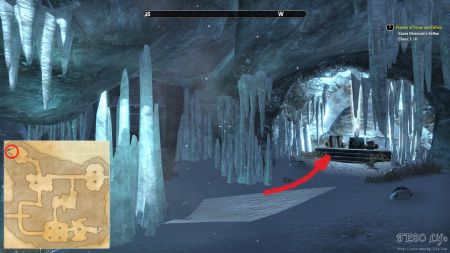
Once you take the quest and complete its first step, you’ll get the next step “Honor Orsinium’s Founding Clans”. This is where the tricky part comes. Once you honor the fallen, you’ll need to use the specific signed pressure plates to unlock the door and continue further. Small tip for solving (if you don’t want to read on further to avoid spoilers) is: every time you use the correct sign, it will raise a small door weight on your left. You can just keep finding the right sequence, once it is risen four times. The sign order, that unlocked the Hammer’s Bypass for me is: Tumnosh, Morkul, Shatul and Igrun.
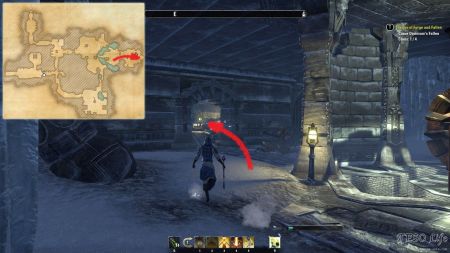
At last you’ve unlocked the door and you are in the area. Keep to your right all the time. There is another entrance you have to go through. Luckily for us, it doesn’t require any unlocking, you can just go through it. This is the most eastern part of the dungeon. From its entrance, on the first crossroad turn right. In the next larger cave, you’ll find the Old Orsinium Skyshard.
Washed down river by Dwarven boilers.
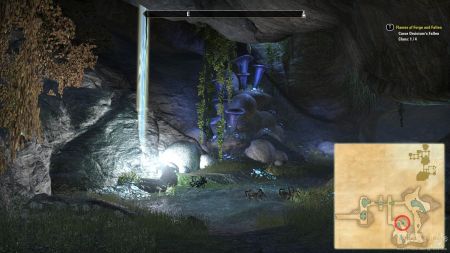
To find the entrance of this public dungeon, you have to follow the river in this area. There is a bit of swimming needed as well, but don’t worry, you won’t freeze.
Unlike the “troubles” you have to go through in the other Wrothgar public dungeon shard hunt, it is not the case in this one. It is also not easy as well. At the beginning head toward the eastern part of the first room. There is a small passage, not shown on the map, you need to go through. It takes you to a new dungeon area. Now you have to progress a bit, just keep going, following the road, until it takes you past a small passage, just next to the waterfall. This is where the area is a bit wider. Follow the river and spot the second waterfall. On top of it, there is our 1/3 skill point. Go around the waterfall and climb it. There is a rather strange teleporting animation done from here, don’t know if it is intentional or it was a bug.
Surrounded by silver.
If you pay attention to the whereabouts of this dungeon on the map, you can spot a small lake. Go toward it and you’ll see some wooden platforms. They lead toward the dungeon’s entrance. If you are approaching this area from south, you will be at a significantly higher area above the dungeon. Jumping down to death, was worth for me, since going around might take too long.
We are now inside the dungeon, following a path to our right, toward the southwestern corner. There, on the ground, next to some shiny, probably silver, rocks is the shard. If you want to kill the dungeon boss as well, you’ll need to head toward the opposite side – to the northeast.
An unusual egg for harpies.
Once you leave the city from its northeastern road, go right. Kill (or not) the group boss from King-Chief’s Throne and go uphill, just a bit north from the dungeon’s map location. There is a small uphill path just north from it. If there wasn’t a map marker, this dungeon would be consider as one of the well hidden ones. The reason it is so well hidden are small, wooden, wrecked, doors, and the trees that block your view.
While skyshards in dungeons are usually found in larger rooms, it is not the case with this one. You’ll find it in a tunnel in southern part of the delve. If you are lucky, and there had not been someone before you here, you’ll see an unusual scene. The harpies actually think that this is their egg, rather funny.
Pried from a necromancer’s cold, dead hands.
Head toward the wayshrine, if you don’t have it already. You’ll need to approach the Sanctum from the north. If you zoom in the map, you’ll spot this place on the map by its beige color.
The longest dungeon tunnel hides
in its western part our skill point upgrade. It will be in the higher tunnel area, close to some metal bars, across from a bookshelf. There is not much of a resistance inside, which is understandable considering this is a solo dungeon. If you want to kill the Sanctum’s boss as well, head to the delve’s southeastern room.
Kept as a prize in the cold Dwarf tomb.
This is the most northern dungeon. The Zthenganaz front door is in a tone of other dungeon entrances, hidden, a bit hard to find, if it wasn’t for the map marker (bless it). It is close to the road, beyond some ice stalagmites and stalactites.
While inside Zthenganaz, go toward its farthermost end. In the northwestern part of the dungeon is where the shard is hidden. Due to the light that comes from the ceiling and shines upon the near ice crystals, it is hard to spot it. Do not get discouraged if you don’t see it right away, just reach its end, and it will be there.
In a subterranean spider oasis.
To find an entrance of this dungeon, you have to reach the lower level in this area. If you find yourself above, just follow the waterfall down the stream. There are small ledges you can jump from, and not get hurt too much. The front door of this dungeon almost perfectly blends into the mountain. I would totally miss it, if there wasn’t the map marker. Just approach it, and the interaction option will appear. It is close to the waterfall, next to some lit torches.
This is a rather small dungeon. The shard is in its dead end room, southeastern corner, in a small pond. If you are afraid of the spiders, you won’t like this dungeon, as it is full of them. I guess I was lucky, since someone had already killed them before I’ve reached the area.
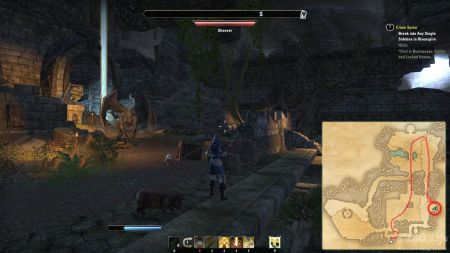
Amidst the crumbling gargoyles.
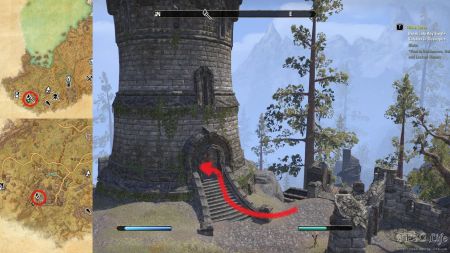
The entrance of this delve is not your typical front door. Someone actually build a tower on top of it. In order to enter, find this tower and a hatch on its ground floor. It is a passage inside the delve. If you are a fan of a spell spell critical and spell damage gear, be sure to check out the nearby Boreal Forge to the east. You can craft Law of Julianos set here, with a favor toward the spell caster traits.
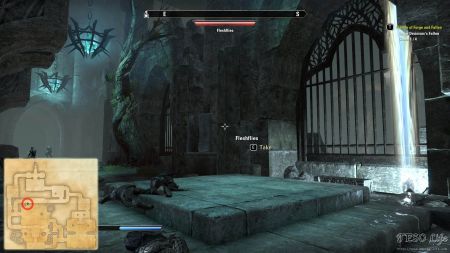
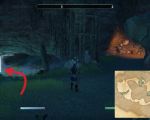
From the entrance head north. Find a small passage that conects first larger cave room, with the one on north. Go through it and now keep toward your right. In the corner of this room, there is a small staircase that takes you toward the eastern side of the dungeon. Once you are on it, head south. Careful not to drop down from here, as it is required to re-do the route again if you want to return. The shard in this spot, is protected by a crumbling gargoyle, hence the name I suppose.

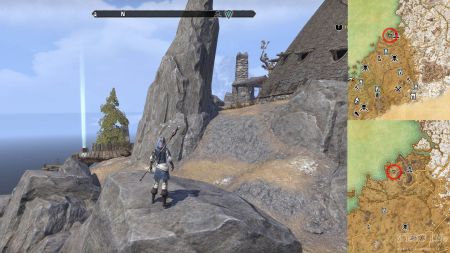
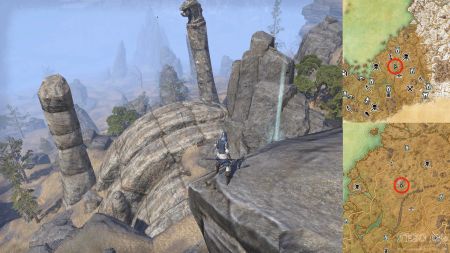
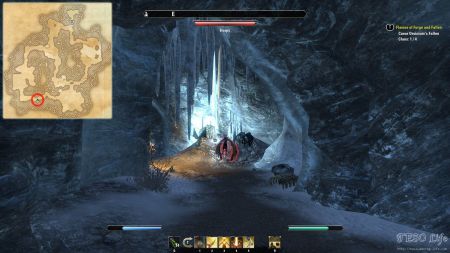
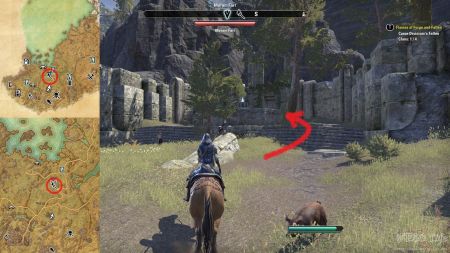
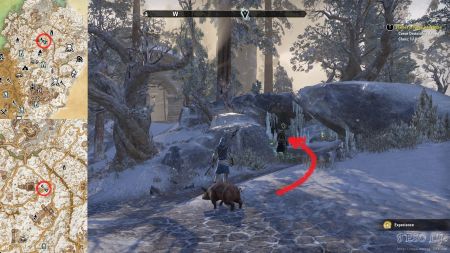
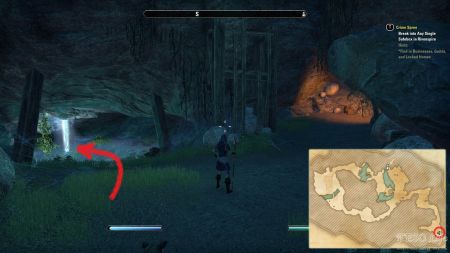
There is 17 th one in a delve day #1
Yes, I can confirm. The 17th shard “Amidst the crumbling gargoyles” is in Watcher’s Hold, the delve right by the 1st skyshard.
Thx for posting, made it much easier to find.
By # 1
So Love this game and this page makes it even better.thanks!
On #17, go right at the entrance turn north at the far east side of the dungeon. It will take you straight to the skyshard & gargoyle without dealing with either of the 2 main rooms.