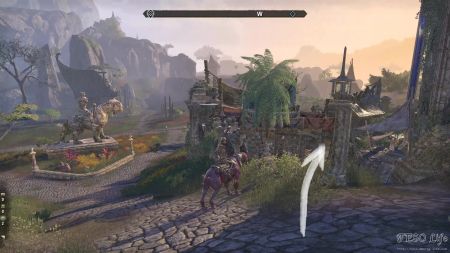
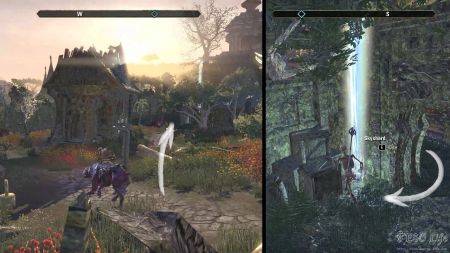
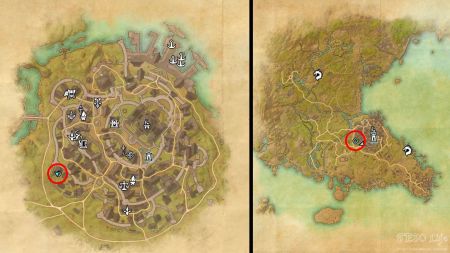
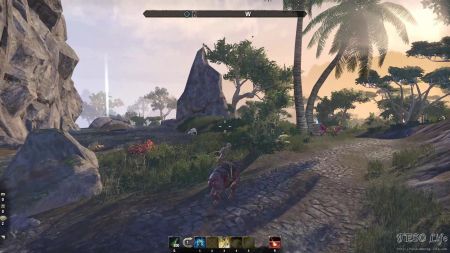
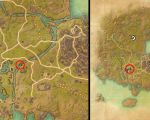
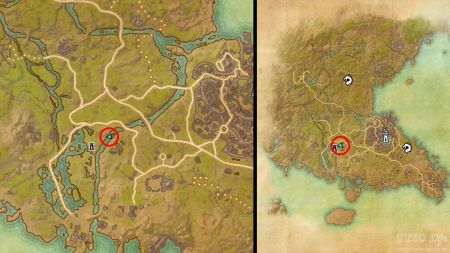
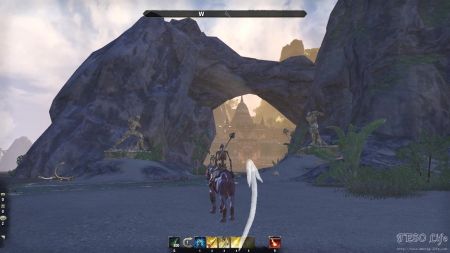
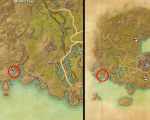
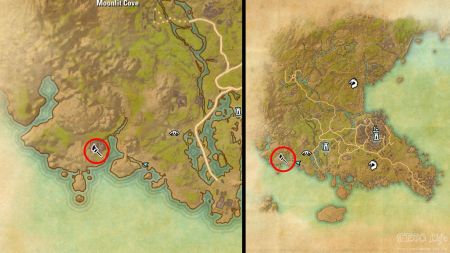
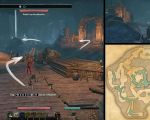
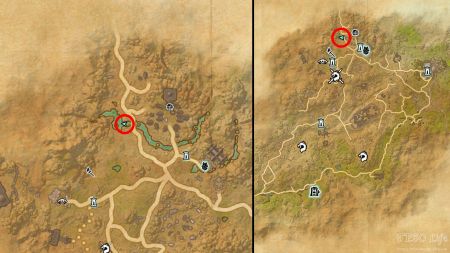
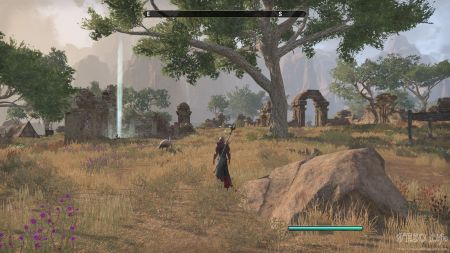
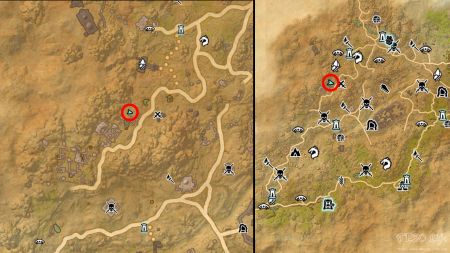
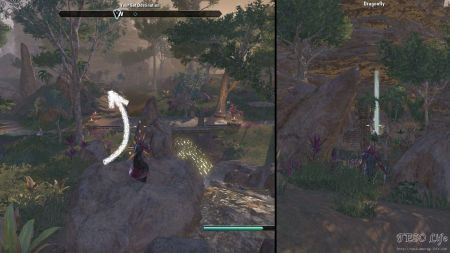
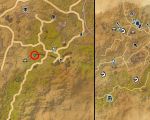
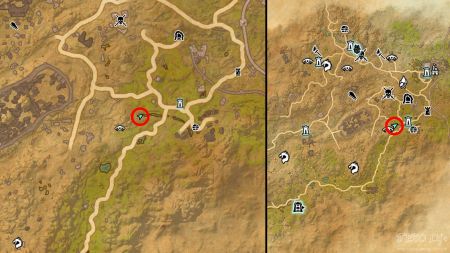
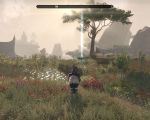
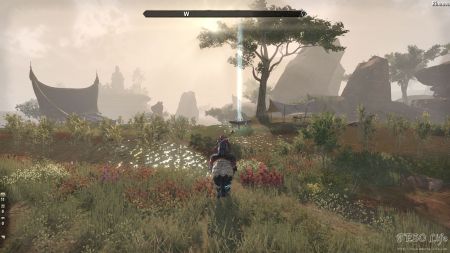
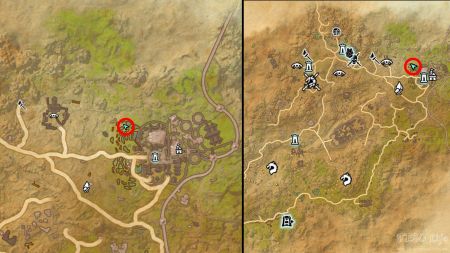
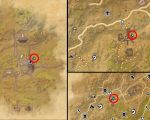
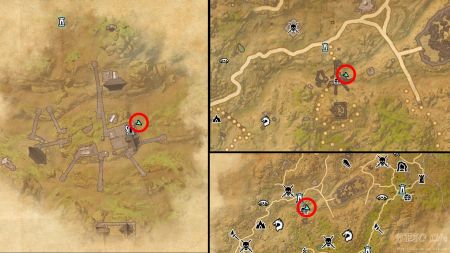
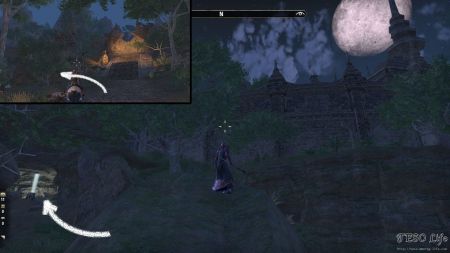
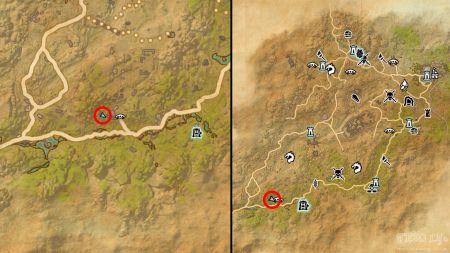
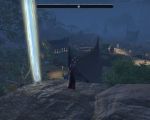
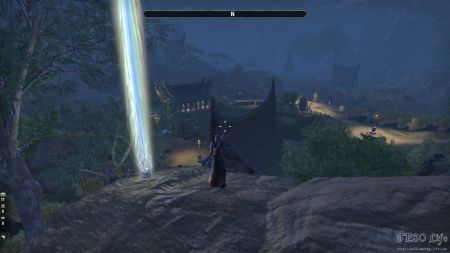
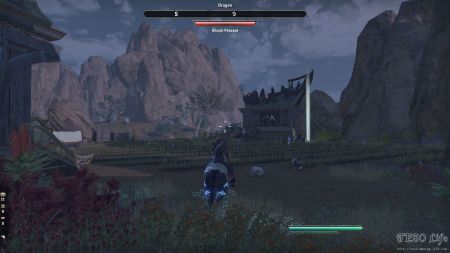
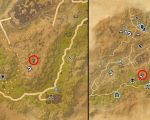
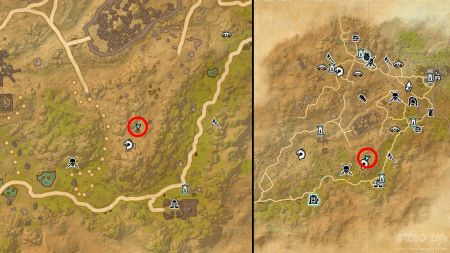
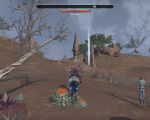
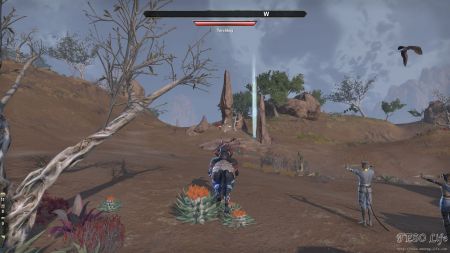
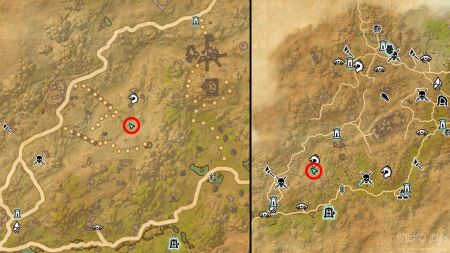
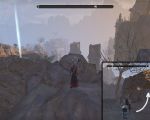
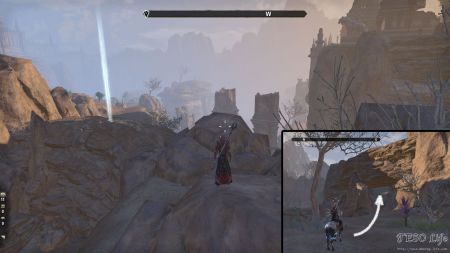
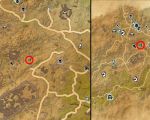
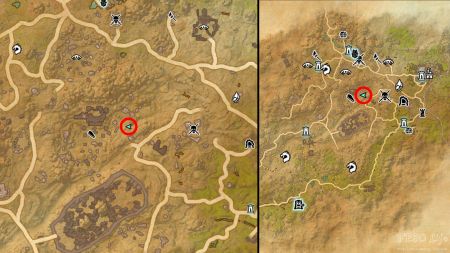
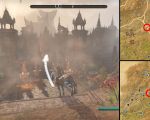
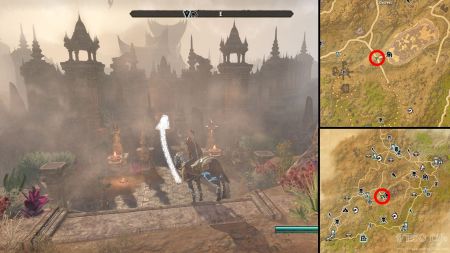
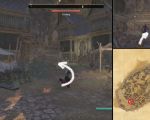
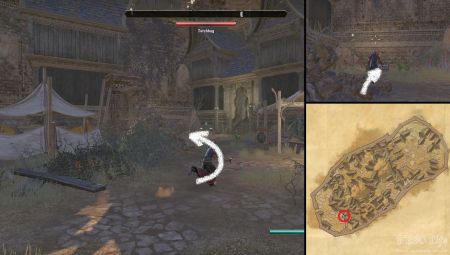
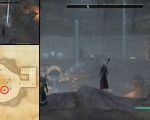
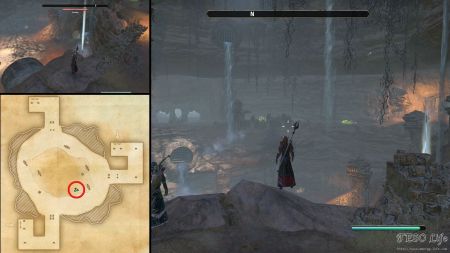
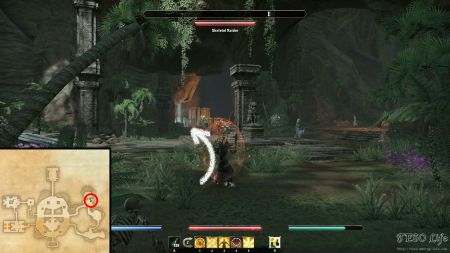
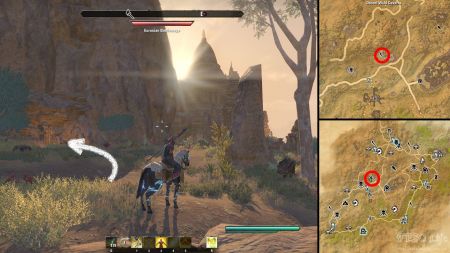
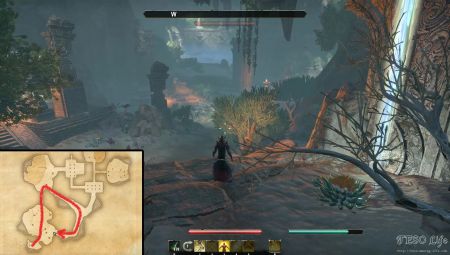
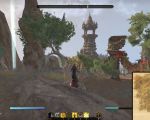
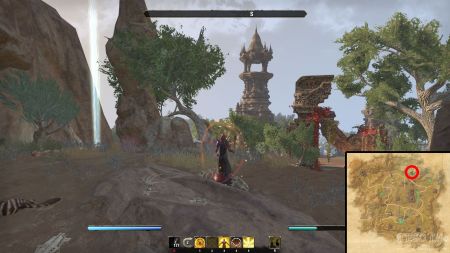
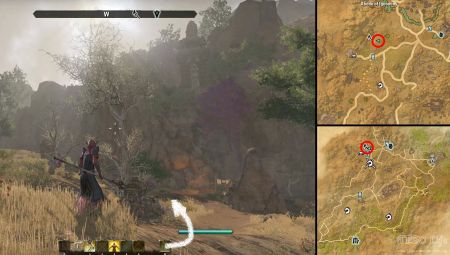
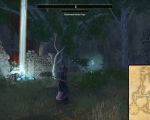
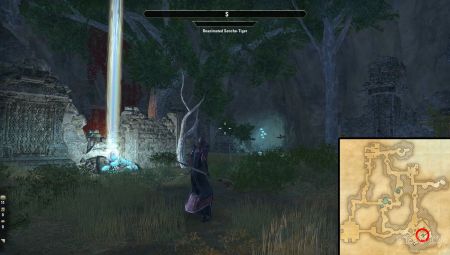
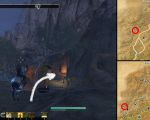
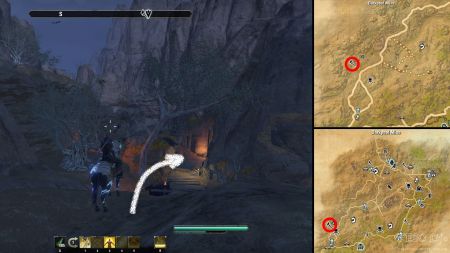
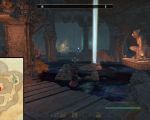
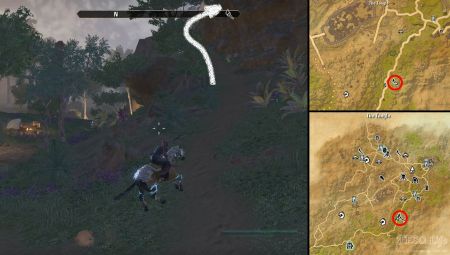
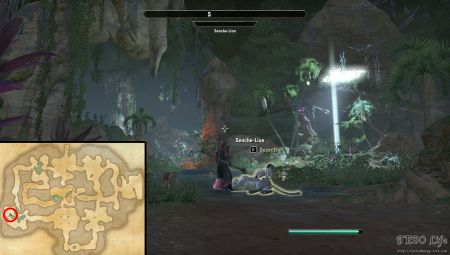
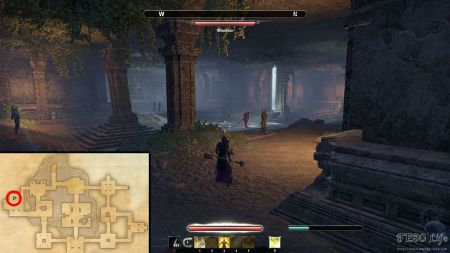
If you look closely at the map, you can spot a small circular part of the road in southern Senchal. If you follow this path out of town, you’ll soon notice a large statue near the main road. Don’t go toward it – pan your view to the west instead. There is a small pathway there that leads to an area with cloth tarps. Go down this pathway and keep to your right, close to the city’s main wall. Turn right at the first small section and continue forward. You’ll pass by a ruined house on your left. At this point, you’ll spot yet another burned ruin in the distance. This is where the lurking takes place. Find an entrance covered in vines in order to enter the ruin, and use the skyshard.
Author Archives: Serge
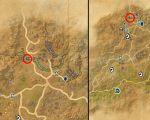
ESO Southern Elsweyr Skyshards Location Map
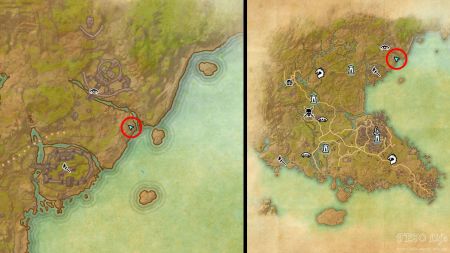
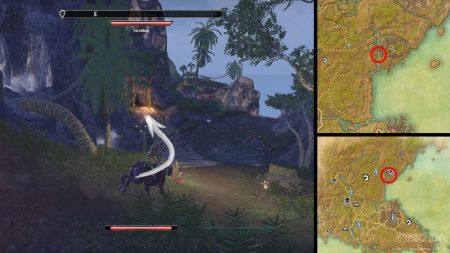
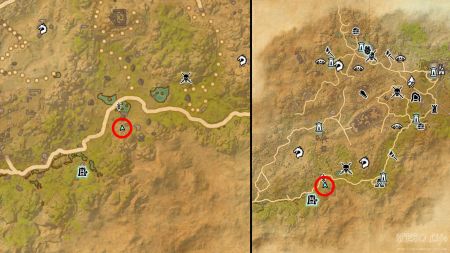
Overlooking the coast, southeast of Doomstone Keep
This is the first of many Southern Elsweyr skyshards, and also the one that is the farthest away from the starting map location in the southern town of Senchal. If you’ve just started this zone, and want to pick up all the skill points first, you better leave this one for last.
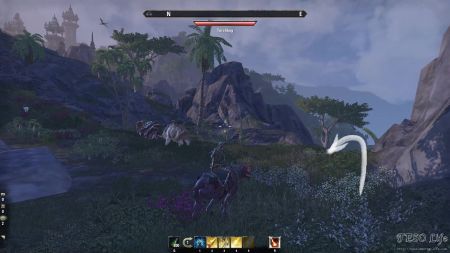
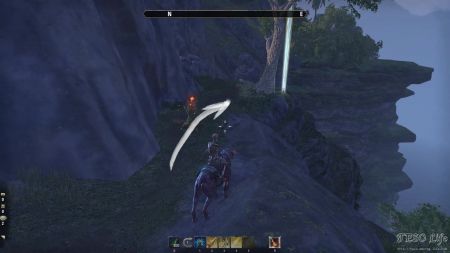
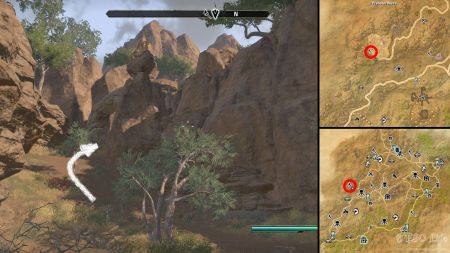
This spot is on the edge of a high coastal hill. If you pay attention to the map, you’ll see small islands near the coast. The second to last island (from south to north) is the closest to our goal. Follow the road from the south by keeping close to the eastern shoreline. The goal is to pass Pridehome Wayshrine on the west and Forsaken Citadel on the east. Head to the northeastern corner of the plateau by the river north from this delve. In this area, you’ll spot two fighting beasts – a Mountain Bristleback and a Haj Mota. There is a small path going downhill near them, toward the cliff. The skyshard is down this path, past a Spriggan, next to a tall tree.
Lurking inside a burned ruin in west Senchal
If you look closely at the map, you can spot a small circular part of the road in southern Senchal. If you follow this path out of town, you’ll soon notice a large statue near the main road. Don’t go toward it – pan your view to the west instead. There is a small pathway there that leads to an area with cloth tarps. Go down this pathway and keep to your right, close to the city’s main wall. Turn right at the first small section and continue forward. You’ll pass by a ruined house on your left. At this point, you’ll spot yet another burned ruin in the distance. This is where the lurking takes place. Find an entrance covered in vines in order to enter the ruin, and use the skyshard.
Where water falls in the Western Plains
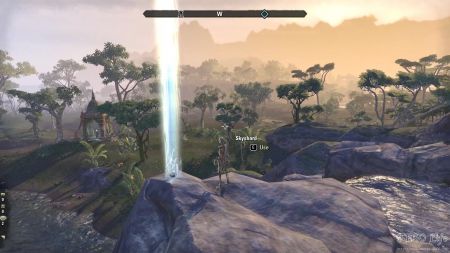
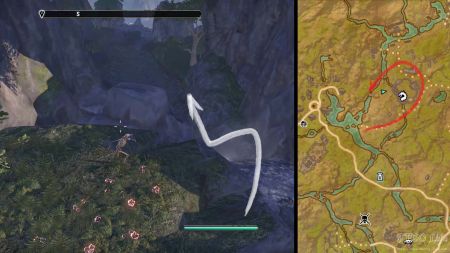
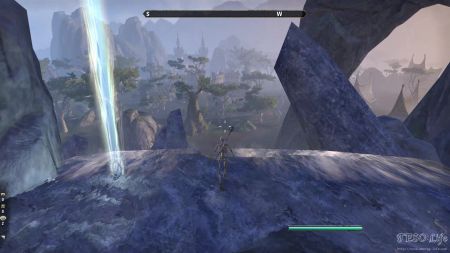
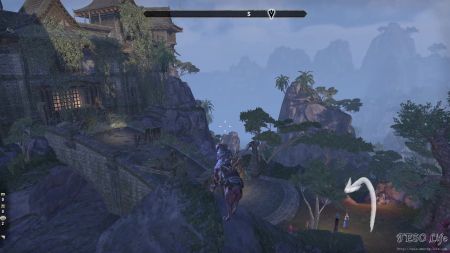
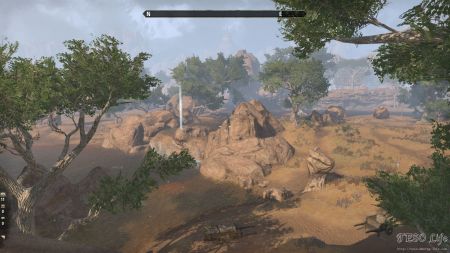
There are three bridges on the river west from Senchal. Following the river downstream, you should pass by the southernmost one at the end. There’s a broken carriage on the river bank there, and a waterfall nearby. The shard is on a rock on top of this waterfall, overlooking the plateau below, with the Wayshrine in the distance.
If you come here in the morning, before the fog has lifted, the view of the area is just astounding. The trees with their beautiful crowns, mountain ranges in the distance, the orange rays of sun breaking through the fog – the developers did a great job. Maybe it’s because we are not used to looking up at the trees, but the way this spot is positioned so you’re forced to pan your view in a certain direction is what gets me.
Where falling water meets the natural arch east of Black Heights
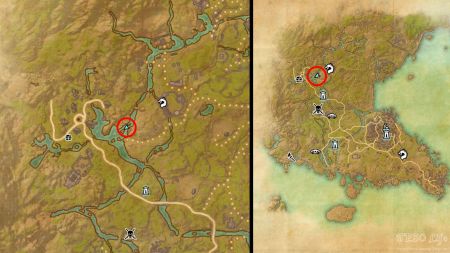
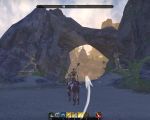
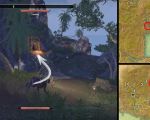
If you go east from the Black Heights settlement and follow the river northeast, you’ll soon come to a large waterfall. This is where the falling water meets the natural arch to the west. It’s rather easy to spot this natural arch, as it is massive. The skyshard is on top of the waterfall. To reach this part of the river, you’ll need to go all the way around, following a southern path.
At one point, you’ll pass by some ruins where a Dragon lands. Go around them, and continue downstream. There will be a small waterfall you’ll need to drop down before reaching the big one, and your final destination. Considering this is a remote place, one may question why there is a small camp with a fire east from the waterfall Skyshard. I’ve found a rose inside a small sack there, which might be a part of something that’s better left unsaid.
Across a rope bridge in Moonlit Cove
The entrance to Moonlit Cove is close to the water. Just follow the shoreline and you’ll spot something that looks like a stone temple. Shezar the Sibilant, a Kajiit, will await you near the entrance, offering you a quest to cleanse the sacred shrines inside the delve for a prize.
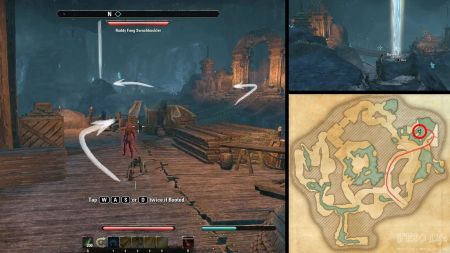
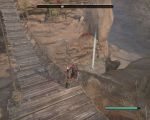
Continue forward from the entrance, towards the northeastern part of the cave. As you leave the tunnel leading to this large area, you’ll spot a rope bridge nearby. You should also be seeing the skyshard’s light on the other side of the cave, on top of a waterfall. Cross the rope bridge and fight off the Ruddy Fang members that might be following you. Close to the shrine near the edge of this pond, you can find a rock that divides the waterfall into two streams. This rock holds the skill point we are after. The jump from here is totally safe, not dangerous at all.
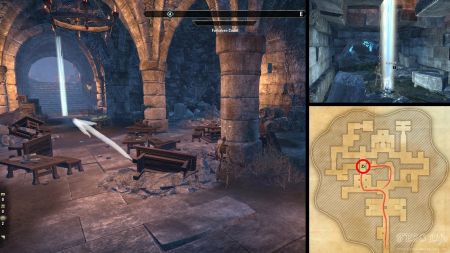
Within the lower tunnels of the Forsaken Citadel
The path that takes you to the dungeon’s entrance is used by one Imperial female called Catina Garrana. She is the dungeon’s quest giver. Go down the path close to the main bridge, and in the lower area, you’ll spot a wooden bridge that will take you inside.
The exact spot where the Forsaken Citadel skyshard is, is in a part of the delve where two paths go one above the other. It is in the northwestern part, next to a room with lots of wooden tables, chairs, barrels… This is a room with four large central pillars. You can see the skyshard’s glow from the upper path, but you’ll need to jump into the hole to reach the lower path, where you can actually interact with it. The enemies you’ve picked up along the way won’t follow you down the hole – they’ll take another route instead, and you’ll be locked in combat until they reach you, hit you once, then change their minds and head back. Luckily, this won’t stop you from interacting with the shard. That’s the last shard on the list – have fun exploring the vast zones of Elder Scrolls Online.
Where Water Falls In The Western Plains Skyshard
There are three bridges on the river west from Senchal. Following the river downstream, you should pass by the southernmost one at the end. There’s a broken carriage on the river bank there, and a waterfall nearby. The shard is on a rock on top of this waterfall, overlooking the plateau below, with the Wayshrine in the distance.
If you come here in the morning, before the fog has lifted, the view of the area is just astounding. The trees with their beautiful crowns, mountain ranges in the distance, the orange rays of sun breaking through the fog – the developers did a great job. Maybe it’s because we are not used to looking up at the trees, but the way this spot is positioned so you’re forced to pan your view in a certain direction is what gets me.
Where Falling Water Meets The Natural Arch East Of Black Heights Skyshard
If you go east from the Black Heights settlement and follow the river northeast, you’ll soon come to a large waterfall. This is where the falling water meets the natural arch to the west. It’s rather easy to spot this natural arch, as it is massive. The skyshard is on top of the waterfall. To reach this part of the river, you’ll need to go all the way around, following a southern path.
At one point, you’ll pass by some ruins where a Dragon lands. Go around them, and continue downstream. There will be a small waterfall you’ll need to drop down before reaching the big one, and your final destination. Considering this is a remote place, one may question why there is a small camp with a fire east from the waterfall Skyshard. I’ve found a rose inside a small sack there, which might be a part of something that’s better left unsaid.
Across A Rope Bridge In Moonlit Cove Skyshard
The entrance to Moonlit Cove is close to the water. Just follow the shoreline and you’ll spot something that looks like a stone temple. Shezar the Sibilant, a Kajiit, will await you near the entrance, offering you a quest to cleanse the sacred shrines inside the delve for a prize.
Continue forward from the entrance, towards the northeastern part of the cave. As you leave the tunnel leading to this large area, you’ll spot a rope bridge nearby. You should also be seeing the skyshard’s light on the other side of the cave, on top of a waterfall. Cross the rope bridge and fight off the Ruddy Fang members that might be following you. Close to the shrine near the edge of this pond, you can find a rock that divides the waterfall into two streams. This rock holds the skill point we are after. The jump from here is totally safe, not dangerous at all.
Within The Lower Tunnels Of The Forsaken Citadel Skyshard
The path that takes you to the dungeon’s entrance is used by one Imperial female called Catina Garrana. She is the dungeon’s quest giver. Go down the path close to the main bridge, and in the lower area, you’ll spot a wooden bridge that will take you inside.
The exact spot where the Forsaken Citadel skyshard is, is in a part of the delve where two paths go one above the other. It is in the northwestern part, next to a room with lots of wooden tables, chairs, barrels… This is a room with four large central pillars. You can see the skyshard’s glow from the upper path, but you’ll need to jump into the hole to reach the lower path, where you can actually interact with it. The enemies you’ve picked up along the way won’t follow you down the hole – they’ll take another route instead, and you’ll be locked in combat until they reach you, hit you once, then change their minds and head back. Luckily, this won’t stop you from interacting with the shard. That’s the last shard on the list – have fun exploring the vast zones of Elder Scrolls Online.
ESO Elsweyr Skyshards Location Map
Near Riverhold, where the river falls
To use the skyshard where the river falls, follow its flow downstream. This means going west, and not east, where the river begins. This part of the river is also the widest by far, due to the fact that this is where the lake starts.
The river fall is not that spectacular as you might have expected by now, thanks to all the beautiful surroundings in Elder Scrolls Online. This doesn’t diminish its value at all, though, as it still dominates the area. If you at any point come to this area from the west, you’ll get to enjoy this calming place, and will without any problem spot the shard in the distance. It is on a small rock, next to a heron that seems to like this place and the abundance of the fish located below, in the distance. It’s almost like he’s amazed by the nearby light, because at some point it probably draws the fish towards him, making it easier for him to get food. His luck is about to turn, because the light will fade away due to your actions, but he will figure out a new fishing spot for sure.
In the ruins where poachers Prowl
The ruins are on the other side of the main road, opposite the Prowl map icon. Coming from the north, following the mountain range, this is where you’ll first spot the ruins. On this side of the road there are also two small ponds. You’ll find a couple of perpendicular stone walls north from the larger one, the one with the ruins at its center. There is a tall tree close to them, as an additional landscape marker that makes finding it easier. The skyshard is tucked away in the corner formed by the two ruined walls.
At the creek’s end, where shadows dance
The creek’s end is in the western part of the stream. If you stand on the main road bridge, south from Hakoshae, it is clear that the creek goes west. It has a small waterfall on its east side, which you can use to get a sense of the surroundings. The shard’s glow is not visible from this point, as it is a bit further inland. The small hill next to the bridge is also not helpful, as it blocks the view. Once you pass this hill, you’ll be able to see the guiding light in the distance, marking your end goal.
Following the creek, you can actually get to its end, at least above ground – it clearly continues its journey further through the small cave entrance, just big enough to accept all water. I wonder if this area floods during heavy rains. Maybe the reason there are ruins here is due to poor planning.
In a cart among Rimmen’s canes
Rimmen’s cane fields are scattered in front of the town’s western entrance. These fields are full of small ponds that we think serve as a nurturing ground for the canes. If you approach the town from the west, look toward the north on your way up. There, in the distance, you’ll notice a tall tree. Head toward this tree. As you come closer, you’ll also spot a small camp with a white rooftop and a cart. This is the cart mentioned in the title of the skyshard. A few more steps toward the tree, and the shard’s beam becomes visible, and it can become the guiding star for the rest of the journey. Citizens of Rimmen built those walls a bit further from the edges of a hill, the same one that hides a stunning view of the surroundings. Maybe it was meant as a reward for those hard-working cane farmers. Either way, it’s one more memorable place in the Elder Scrolls Online world, that tells a story without making you read a book.
In a shattered crate beneath the Stitches
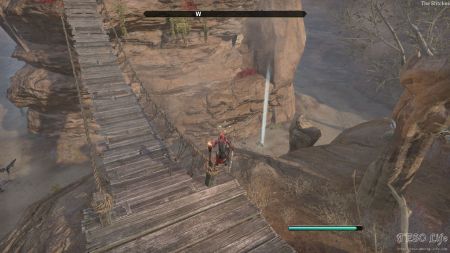
Approach the area from the east. You’ll see the big building with the pagodas from the distance. As you approach it, you’ll find a hanging bridge leading into the area. Instead of using it, look down and to the right. You’ll see the recognizable blue ray of light down in the gorge. It’s pointing to a broken crate, the one mentioned in the clue.
The crate probably fell from the heights of the Stitches, but the obvious question is why didn’t anybody go down to the gorge to get it? The skyshards are pretty valuable stuff, so you’d expect somebody to make the effort to collect the lost treasure. Instead it’s just sitting there, waiting for intrepid adventurers to make a go for it.
In a hidden cave beneath the Moon Gate of Anequina
While writing the description for this particular spot, I was wondering how this location got its name. Luckily for me, I was here during the night. When approaching this area, there are long stairs before the closed gate. They take you up the small hill, and if you pan your view upwards just for a second, you can spot a giant moon. It seemed bigger now, and brighter, but that probably wasn’t the case.
As you approach the main gates, you’ll notice that they are locked. No cause for alarm – we don’t really need to go inside. Our goal is just a bit west, toward the rocks. Go back to the start of the stairs. Turn west and follow the rocky plateau on your right. Do not climb the small hill that comes shortly after, but continue straight, passing by a large tree. A couple of steps later, just as you turn right after a small boulder, you’ll be able to spot a tiny, hidden cave in the distance. For some reason, wolves in this area are fond of its glow, and would not give it up easily. Do not be sorry for defeating them, as they will miraculously rise from the ashes a short while after.
Overlooking the buzzing hives of Merryvale Farms
All the places of interest on this southern road are either at or just next to the main path. This includes Merryvale Farms, which is in a valley filled with large ponds. A decent place to grow the needed cultures. Due to its grand beauty, it feels like this place has been here for a long time. The beautiful rooftops, magnificent bridge, and fenced fields make the workers enjoy their work.
If you approach Merryvale Farms from the east, you can spot an undocumented path that leads south, uphill towards the Fragrant Moons Plantation gate. This is the highest point of the Farm so it’s not hard to spot from afar. There is a large barn-looking building next to the road. As you get close to the Fragrant Moons Plantation gate, turn right and head west. There is a small gap and a path a bit further on to your left. Go through it and jump on the rocks. The skyshard is at the end of this rocky plateau. The buzzing hives mentioned in the title are just underneath it – there’s a way to reach it through there as well, but with more of a climbing challenge.
Behind a burned out farmhouse
From there, head directly northwest. As you reach the foot of the hill, you’ll end up at a farmstead. One of the houses at the farm has burned down, and it’s pretty easy to spot. As you approach it, you’ll see the characteristic blue glow next to it. It will lead you to the skyshard, which is behind the crates.
It’s pretty obvious what happened here. It is the season of dragons, after all. Not only that, but there’s one of them foul beasts a short distance to the south from this poor, unfortunate farm. He’s probably the one responsible for the arson.
In the shadow of a Dragon’s wings
The best way to reach it would be to spawn at the Stitches wayshrine, then follow the road southwest until you reach Cicatrice. Once you get there, turn east and head into the hills. The shard is near the top of the hill, next to a couple of stone pillars. You might also spot a couple of Khajiit facing the skyshard, with their weapons raised like offerings.
Their names are Saziza and Tashdu. We didn’t get the chance to talk to them since we were in a hurry, but it looks like there’s a story there. Maybe some weird desert cult? Or a couple of brave warriors preparing to take on the nearby dragon?
On the ridgeline overlooking the Ashen Scar
Follow the road from Hakoshae Wayshrine to the west until it changes course. At one point, just north from Orcrest, you’ll notice a small crossroad with a tiny path leading west. North from this exact crossroad, there is a trail that takes you down to the lower parts of Ashen Scar. If you zoom in on the map in this location, you can spot a small divide in the mountain range. Find this trail, and you’ll also find Vasterie, the NPC that gives the POI-related quest on the way down the hole.
This specific trail has a long and large stone overpass. This is the ridgeline you are looking for. No matter if you are coming from the east, from Ashen Scar, or from its central part, you’ll notice this small gap in the mountain that makes the trail visible. To find the skyshard, go up the hill once you find the trail, and go over the stones that form the platform edges. The shard is on top of the overpass. If you pay attention you’ll notice it easily, as there are no trees or other elements that would fog a traveler’s view.
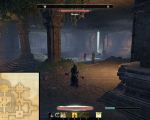
In the darkest depths of Orcrest, where all the pipes converge
“The once-thriving town of Orcrest may be the location in Northern Elsweyr that was hardest hit by the Knahaten Flu and the breakdown of society that followed. Abandoned and haunted by its own dead, Orcrest is now a place of dread for the nearby surviving Khajiit.”
This is one of the best hidden skyshards in Elsweyr. You really need to rely on the clues from the title, and to think a bit outside of the box. The first part of the sentence, “In the darkest depths”, is the key to everything. It points toward the fact that this one is found at some lower, underground part of Orcrest.
The entrance to the area where all the pipes converge is called the Sewer Access. As you find yourself at the gates of Orcrest, continue forward but keep to your right. Go to the left of the pathway with a broken-wheeled cart. You’ll pass by an orange cart on your right, and a green bush on your left. This is where you turn left, toward a part of a building wall that is a bit wider than the rest, with a vine coming down from the top. The wooden doors of the Sewer Access are here at the bottom.
Once in the area of the darkest Orcrest depths, continue forward toward the central part. If you look around, you’ll spot a lot of pipes converging at the center of the room. When you come close to the edge, you’ll spot the shard’s glow at the bottom of the hole.
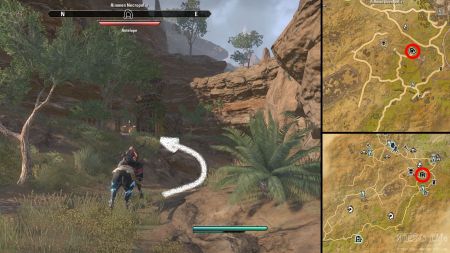
On an altar, deep within the Rimmen Necropolis
“The Rimmen Necropolis, a sprawling subterranean burial site so old and extensive that no living Khajit has ever explored its full expanse. It dates back to at least the time of the Merrunz-worshiping Darloc Brae, and many of his soldiers were buried there.”
The altar we are headed toward is located in the northeastern part of the delve. There are two paths leading up to it, and both are filled with enemies, which is not weird as this is a public dungeon after all. No matter which path you take, you’ll end up in a room full of enemies. This altar room has a stone pillar at its center, with two animal statues next to it. The skyshard is in the northeastern part of this room, on what looks like a stone grave. Although this is a small room, the specific place is well hidden, and you might not spot it at first.
On an unsteady ledge, buffeted by the Desert Wind
“These extensive subterranean halls date back to the early First Era time of Darloc Brae, the “Golden Beast” who conquered all of Anequina. Khajiiti tradition holds that this place was built as a refuge for those fleeing the Golden Beast, but its original name has been forgotten.”
The unsteady ledge that hides our skyshard can be seen from the entrance, as you get into the first main room. It is on your right, next to some stone pillars. However, you can’t climb on it. At least I wasn’t able to. Instead, you have to go left from it, down the path, up the stairs on the right, into the hallway and into the cave to your right shortly after. Follow this path, passing by a large temple on your right, until you reach that very unsteady ledge from the start. I am not sure if the enemies that follow you to this spot have any kind of pushback abilities, but it would be something I would give them as a developer. Be sure to clear them out instead of gambling with the possibility of being pushed back to the start.
Tucked away on the highest scarp of Predator Mesa
“Since time out of mind, the hunters of Northern Elsweyr have gone to Predator Mesa to test their skills against the region’s most dangerous wildlife. Those who succeed are said to be favored by the Hungry Cat.”
Predator Mesa has been a proving grounds for Elsweyrian hunters since time immemorial. It’s the home of the province’s most dangerous beasts, and those who manage to overcome the challenge are said to be favored by the Hungry Cat.
Once you’re in, head to the northern edge of the area. There’s a plateau you can climb by following a mountain path. When you get there, you’ll see the skyshard glowing on the left. Make sure you stop and enjoy the view before you leave – you can see the entire boss arena from here, in all its architectural splendor.
At the mouth of a cave, in an ignoble abode
Just like the other delves, the entrance to the Abode of Ignominy is not exactly next to a road, but a bit further from it, toward the mountains. If you zoom in on the map of this area, you’ll spot a small lake. Head west from it, and you’ll get a notification about the delve’s presence. There is a small camp in front, with an NPC called Narama-ko next to it. She gives the delve-specific quest, while trying to dry off the wet clothes close to the fire pit.
“For the Khajiit, Mafal is the Clan Mother of the Dark Secrets, the recorder of hidden guild and eternal shame. This fallen temple was once the center of her worship, before the Sinner Suicided brought her cult into disfavor. Now it hosts… others.”
The mouth of the cave, where our final goal lies, is located in the delve’s largest room. To get there, head south from the entrance. After a long hallway, you’ll spot the skyshard on the other side, at the entrance to the cave. It is among the ruins, next to some blue foliage, a small tree, surrounded by enemies. They will be consistent in stopping you when trying to use the shard, so you’ll have to defeat them beforehand.
On an oil-slick island in Darkpool Mine
“These pits were originally carved out as salt and sulfur mines back in the days of the terrible Darloc Brae, who dedicated the digs to his Daedric patron, Merrunz. Abandoned for generations, the mines were recently reopened.”
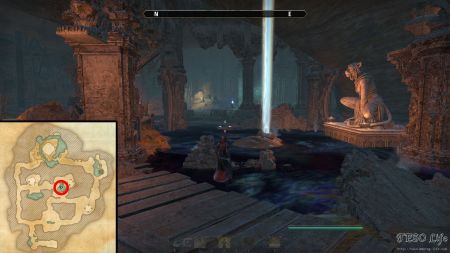
After you pass the crossroads, head left towards the foot of the mountain. The mine’s entrance is relatively hidden – there are some trees blocking the view, and the lower elevation doesn’t help either. Once you’re in, head to the chamber in the middle of the cave. When you enter it, you’ll notice a pond and a big statue of a kneeling Khajiit. The skyshard will be on an island in the pond – the glow makes it hard to miss.
The mines have been used to gather salt and sulfur, which sounds pretty hellish if you ask me. They were dug out during the reign of Darloc Brae, and were dedicated to one of the Daedra, which makes the whole thing even more hellish. Abandoned at some point in the province’s history, they were recently reopened. Scary place, but the skyshard is incentive enough to visit it.
Hidden in the Tangle undergrowth
“In times of war and disaster, the ruthless among the deserters often turn to banditry to survive, establishing lairs and hideaways in out-of-the-way locations.”
When you reach the cave, go inside and head into the chamber in the southwestern corner of the delve. There’s a tiny oasis there and a hole in the roof of the cavern. You’ll find the skyshard among the foliage.
According to the loading screen snippet, the Tangle used to serve as a hideout for bandits and deserters in less-than-fortunate times. Thankfully, there’s none of that now, and there isn’t even an echo of evil-doers inside. However, there’s a fair amount of senche-lions and other beasts, so keep on your toes. There’s a handful of them in the same room as the shard, and you’ll have defeat them in order to grab it.
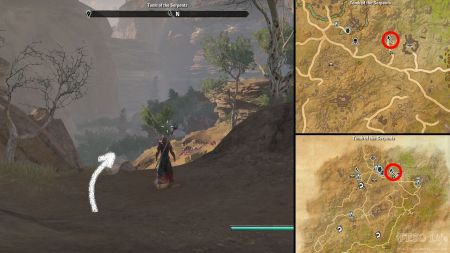
Protected by the armored guardians on the serpents’ tomb
In this part of the map, you’ll notice there are side paths that form away from the main road, each leading to one place of interest. One of them leads toward the Tomb of the Serpents, your current goal. The delve is inside the hole at the end of the path. The quest giver is in front of the entrance. Kiseravi is scavenging some crates, but will give you a new task if you are willing to help out.
“When the Second Empire fell, many Akaviri-descended Imperials fell with it. As scapegoats for the excesses of the Potentates, they were denied burial lin Cyrodiil, but were granted this tomb in Elsweyr to inter their honored dead”.
The armored guardians that protect the shard are in the westernmost part of the delve. Like in most of these cases, you’ll have to follow the path to the left once you get inside. As you enter the fourth room, you’ll spot four pillars that hold the ceiling. There is a minotaur at the center of the room, but you can avoid it entirely if you wish. The Awakened Sharpshooters near the walls will not be that easy on you, and you’ll need to deal with them in order to use the skyshard.
This place is also part of the Mural Mender achievement journey – it’s where you’ll pick up your first fragment. The four guardians near the library will not attack. They will protect the fragment you can only see when you have the related quest, but that is another story…
Near Riverhold, Where The River Falls Skyshard
To use the skyshard where the river falls, follow its flow downstream. This means going west, and not east, where the river begins. This part of the river is also the widest by far, due to the fact that this is where the lake starts.
The river fall is not that spectacular as you might have expected by now, thanks to all the beautiful surroundings in Elder Scrolls Online. This doesn’t diminish its value at all, though, as it still dominates the area. If you at any point come to this area from the west, you’ll get to enjoy this calming place, and will without any problem spot the shard in the distance. It is on a small rock, next to a heron that seems to like this place and the abundance of the fish located below, in the distance. It’s almost like he’s amazed by the nearby light, because at some point it probably draws the fish towards him, making it easier for him to get food. His luck is about to turn, because the light will fade away due to your actions, but he will figure out a new fishing spot for sure.
At The Creek’s End, Where Shadows Dance Skyshard
The creek’s end is in the western part of the stream. If you stand on the main road bridge, south from Hakoshae, it is clear that the creek goes west. It has a small waterfall on its east side, which you can use to get a sense of the surroundings. The shard’s glow is not visible from this point, as it is a bit further inland. The small hill next to the bridge is also not helpful, as it blocks the view. Once you pass this hill, you’ll be able to see the guiding light in the distance, marking your end goal.
Following the creek, you can actually get to its end, at least above ground – it clearly continues its journey further through the small cave entrance, just big enough to accept all water. I wonder if this area floods during heavy rains. Maybe the reason there are ruins here is due to poor planning.
In A Cart Among Rimmen’s Canes Skyshard
Rimmen’s cane fields are scattered in front of the town’s western entrance. These fields are full of small ponds that we think serve as a nurturing ground for the canes. If you approach the town from the west, look toward the north on your way up. There, in the distance, you’ll notice a tall tree. Head toward this tree. As you come closer, you’ll also spot a small camp with a white rooftop and a cart. This is the cart mentioned in the title of the skyshard. A few more steps toward the tree, and the shard’s beam becomes visible, and it can become the guiding star for the rest of the journey. Citizens of Rimmen built those walls a bit further from the edges of a hill, the same one that hides a stunning view of the surroundings. Maybe it was meant as a reward for those hard-working cane farmers. Either way, it’s one more memorable place in the Elder Scrolls Online world, that tells a story without making you read a book.

